Paper Snowflake Ornaments: Original Six-Point Designs
Build sturdy six-point snowflakes from three crossed cardstock strips and small glued details, using a simple drawn guide to keep the arms evenly spaced.
Tutorial at a glance
Materials
- White and pale blue cardstock
- Ruler, pencil and scrap paper
- Compass or protractor
- White craft glue and a toothpick
- Hole punch
- 7 in (18 cm) of thin thread
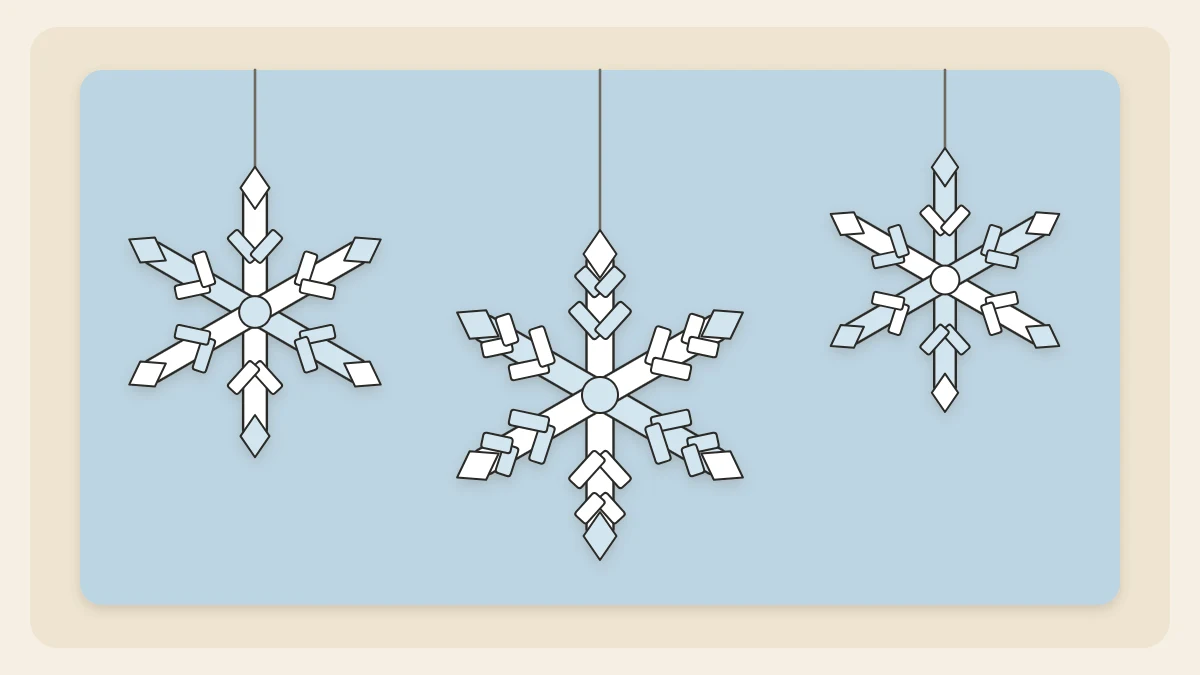
These paper snowflake ornaments are built, not snipped from a folded sheet. Three narrow strips cross at the center to make six arms, and small cut pieces glued along each arm give the snowflake its character. Because every part is a separate piece of cardstock, the result is flat, sturdy and easy to repeat.
The only tricky part is spacing the arms evenly, and a simple drawn guide solves that. Once the guide exists, you can make a whole set in an afternoon and change the details on each one.
What you need
- White and pale blue cardstock
- Ruler, pencil and a sheet of scrap paper for the guide
- A compass or a protractor
- Scissors, or a craft knife and cutting mat (adult tools)
- White craft glue and a toothpick to apply it
- A hole punch for dots
- Thin thread for hanging
Cardstock matters here. Ordinary copy paper curls as the glue dries, and the arms droop once the ornament hangs.
Draw the six-point guide
A six-armed snowflake is three straight lines crossing at one point, each turned 60 degrees from the next. Draw that once on scrap paper and build every snowflake on top of it.
With a compass
- Draw a circle with a radius of 2 in (5 cm).
- Rule a straight line through the center so it crosses the circle at two points.
- Without changing the compass, put its point on one of those crossings and make a small mark on the circle to each side.
- Do the same from the opposite crossing. You now have six evenly spaced points on the circle.
- Rule lines joining each point to the one directly opposite. All three lines pass through the center.
With a protractor
Draw one line, set the protractor on its midpoint, and mark 60 and 120 degrees. Rule a line through the midpoint and each mark.
Go over the lines in pen so they stay visible under a film of glue, and slide the guide into a clear plastic sleeve if you plan to reuse it. Dried glue peels off plastic far more easily than off paper.
Build the basic snowflake
- Cut three strips of white cardstock, each 1/4 in (6 mm) wide and 4 in (10 cm) long.
- Mark the midpoint of each strip lightly in pencil.
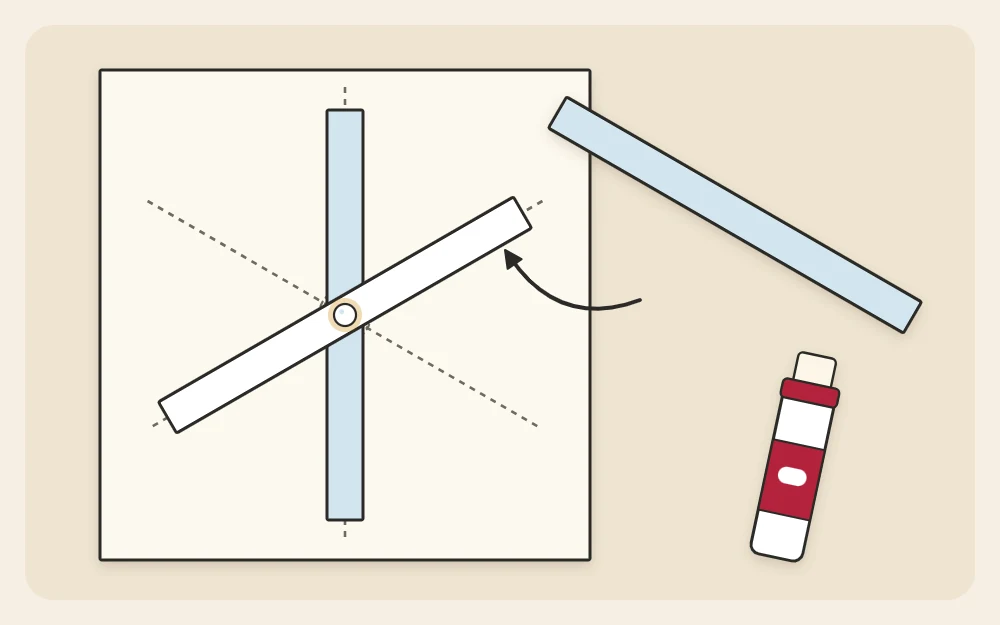
- Lay the first strip along one guide line with its midpoint on the center.
- Put a small dot of white craft glue on the middle of that strip and lay the second strip along the next line. Add another dot and the third strip.
- Check that each arm sits over its line, nudge any that have drifted, then press the center down for a few seconds.
- Leave the snowflake on the guide for roughly 15 to 20 minutes so the center firms up before you add details.
Tip
Use less glue than you think. A dot the size of a pinhead holds a strip; a puddle soaks in, buckles the cardstock and takes much longer to dry.
Add V pieces and diamonds
The details are what turn three crossed strips into a snowflake. Work on one arm, then repeat the same pattern on the other five so the design stays balanced.
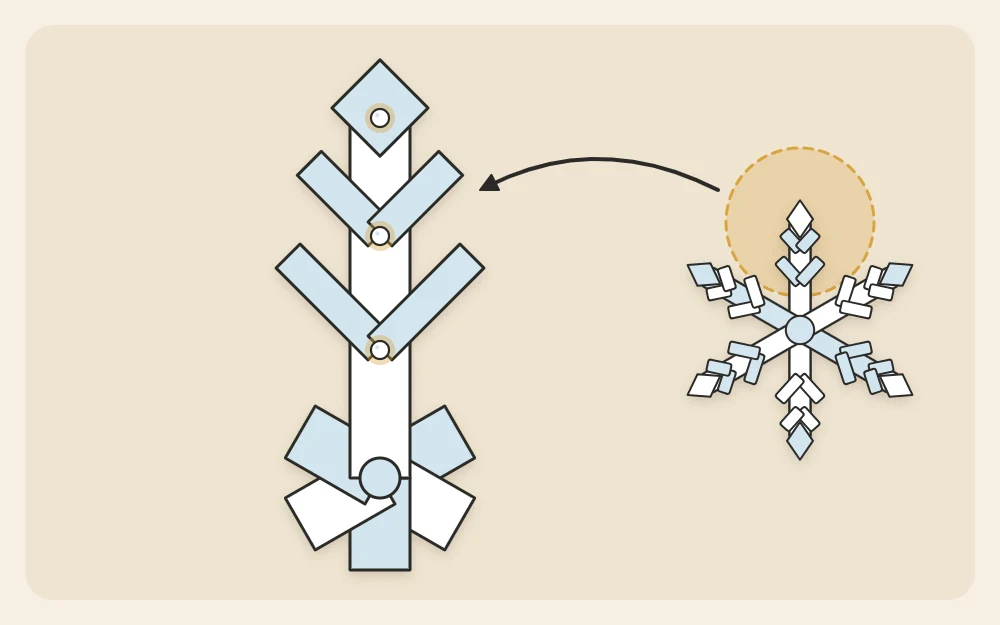
- Cut a strip of cardstock 1/8 in (3 mm) wide and snip it into twelve pieces, each 3/4 in (2 cm) long.
- Crease each piece in the middle and open it into a V.
- Glue one V across an arm about 3/4 in (2 cm) from the center, with the point of the V on the arm and its open side facing the tip.
- Glue a second V about 1/2 in (1.3 cm) farther out.
- For the tip, cut a square 3/8 in (1 cm) on each side, turn it so one corner points outward and glue it over the end of the arm as a diamond.
A toothpick is the easiest way to place glue on pieces this small. Tweezers help with positioning, but fingertips work if you pick each piece up by its ends.
Ways to vary the design
Keep the six-arm frame and change what sits on it. Each of these gives a different snowflake from the same guide.
- Trim each arm end to a point instead of adding a diamond.
- Use one long V and one short V, or three short ones close together.
- Glue a punched dot at each tip and one over the center.
- Add three shorter strips, 2 in (5 cm) long, between the main arms for a twelve-point version. Draw the extra lines on the guide halfway between the first three.
- Cut the main strips in pale blue and the details in white.
The layered version on a card circle
If you want something sturdier, or you are making these with less nimble hands, build the snowflake on a backing. Cut a circle of pale blue cardstock 3 1/2 in (9 cm) across; tracing around a jar lid is fine. Mark its center, line the center up with the guide, and transfer the six directions to the edge of the circle with light pencil ticks.
Shorten the three strips to 3 in (7.5 cm) and glue them straight onto the circle along the ticks. Add the V pieces and diamonds as before, then glue punched dots in the spaces between the arms. Nothing overhangs the edge, so this version is the better choice for a busy tree or for mailing in a card.
Dry flat and add a loop
Paper wants to curl as glue dries. Once the details have set for a few minutes, cover the snowflake with a sheet of plain scrap paper and rest a book on top for about an hour. Drying time depends on the room and the glue, so follow the label.
To hang an open snowflake, punch a small hole in one diamond with a needle and tie a 7 in (18 cm) length of thread through it. On the layered version, glue the ends of a thread loop to the back and cover them with a small dot of cardstock.
A coat of sealer is optional on paper; the guide to finishing handmade ornaments explains when it helps. For more texture on the tree, hang the snowflakes with pleated paper rosettes, or stitch the same six-spoke idea in fabric as a felt snowflake ornament.
Frequently asked questions
How do I get six evenly spaced arms without a compass?
A protractor does the same job. Draw one straight line, place the protractor on its midpoint and mark 60 and 120 degrees, then rule a line through the midpoint and each mark. Those three lines are your guide, and you can reuse it for every snowflake in the set.
Can I use regular printer paper instead of cardstock?
You can practice with it, but the finished ornament will be floppy. Thin paper buckles where glue touches it and the arms sag once the snowflake hangs. If printer paper is all you have, build the layered version on a stiffer backing circle cut from a cereal box.
Why did my snowflake curl as it dried?
Curling usually means too much glue or drying in the open air. Use pinhead-sized dots applied with a toothpick, then cover the snowflake with plain scrap paper and leave it under a book for about an hour. Most curled pieces flatten again with a night under a heavier book.