Accordion Fold Paper Ornaments: Fans, Rosettes and Trees
Learn to score and pleat a paper strip, then turn it into three ornaments: a round rosette, a half fan and a small tiered tree, using only paper, glue and thread.
Tutorial at a glance
Materials
- Scrapbook paper or light cardstock
- Ruler and pencil
- Empty ballpoint pen for scoring
- Thick tacky glue
- Scrap cardstock circles
- Needle and strong thread
- Buttons for centers
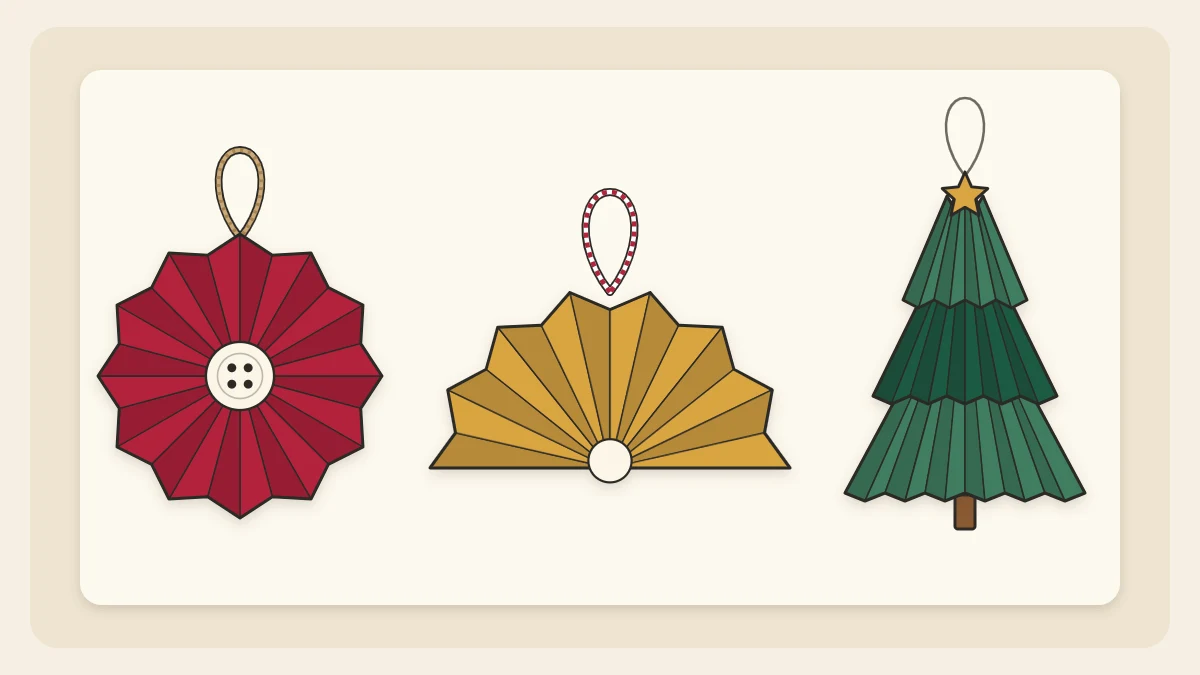
Accordion fold paper ornaments all start with the same move: a strip of paper folded back and forth into even pleats. Join the ends and the strip becomes a round rosette. Pinch one edge and it opens into a fan. Stack three fans and you have a small tiered tree.
None of it needs special tools, and one sheet of paper makes several ornaments.
What you need
- Scrapbook paper, gift wrap with some body, or light cardstock
- Ruler and pencil
- A scoring tool: an empty ballpoint pen or the back of a butter knife
- Scissors (sharp scissors are an adult tool)
- Thick tacky glue and a glue stick
- Scrap cardstock for backing circles
- Needle and strong thread
- Buttons or punched paper circles for the centers
Medium-weight paper pleats best. Very thin paper goes limp, and heavy cardstock cracks along the folds and fights back when you try to close a rosette.
Score first, then pleat
Crisp, even pleats are what make these ornaments look neat, and scoring is what makes the pleats even. A score is a pressed line, not a cut: it tells the paper exactly where to bend.
- Cut your strip with the long edges perfectly parallel.
- On the back, make a small pencil mark every 3/8 in (1 cm) along both long edges.
- Lay the ruler across each pair of marks and draw the scoring tool along it with firm, steady pressure.
- Fold the first score toward you, turn the strip over, and fold the next score toward you again. Keep flipping and folding until the whole strip is pleated.
- Squeeze the finished stack between your fingers and run a thumbnail down each side to sharpen every fold.
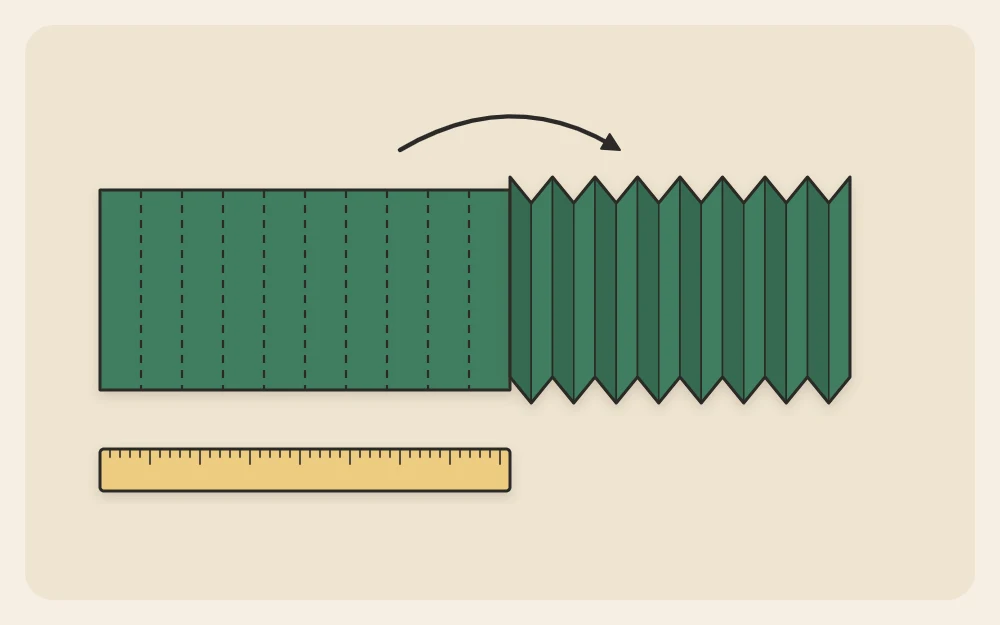
Pleat width changes the look. Pleats of 3/8 in (1 cm) suit ornaments around 3 in (7.5 cm) across. Go down to 1/4 in (6 mm) for anything smaller, and no wider than 1/2 in (1.3 cm) unless the ornament is large.
Make a round rosette
The strip width becomes the radius of the rosette, so a strip 1 1/2 in (4 cm) wide gives a rosette about 3 in (7.5 cm) across. One strip 12 in (30 cm) long is enough at this size. For a fuller rosette, glue two pleated strips end to end.
- Score and pleat a strip 1 1/2 x 12 in (4 x 30 cm).
- Bring the two ends together to form a pleated ring. Overlap the last panel on the first and check that they nest. If they lean in opposite directions, trim one panel off.
- Glue the overlap with tacky glue and hold it for about a minute.
- Cut two circles of cardstock about 1 in (2.5 cm) across.
- Stand the ring on the table like a short tube. Press the top edge down and in toward the middle until the ring flattens into a disc. It will spring back if you let go, so keep one hand on it.
- Spread a generous layer of tacky glue on one card circle and press it onto the center. Hold it flat for a minute or two, then rest a small book on top while the glue grips.
- Turn the rosette over and glue the second circle, a button or a punched shape on the front.

Tip
The card circle does the real work. A glue stick is not strong enough here; use thick tacky glue and enough of it to reach into the pleats.
For a hanging loop, fold 7 in (18 cm) of thread in half and trap the cut ends under the back circle before the glue sets.
Make a half fan
A fan uses a shorter strip and no ring. Cut a strip 2 x 9 in (5 x 23 cm), score it at 3/8 in (1 cm) and pleat it.
- Squeeze the pleats into a tight stack.
- Thread a needle and push it through the whole stack about 1/4 in (6 mm) from one long edge. Needles are sharp, so this is an adult step.
- Pull the thread through, wrap it once around the stack and tie a firm double knot.
- Open the free edge until the two outer pleats lie in a straight line, making a half circle.
- Glue a small half circle of cardstock behind the bound point so the fan stays open, with a thread loop tucked underneath.
Make a tiered tree
The tree is three small fans in decreasing sizes, each pointing upward and opened only partway. Use green paper, or three shades of it.
- Cut three strips: 2 x 7 1/2 in (5 x 19 cm), 1 1/2 x 6 in (4 x 15 cm) and 1 x 4 1/2 in (2.5 x 11.5 cm).
- Score and pleat each one at 3/8 in (1 cm), then bind one long edge of each with needle and thread as for the half fan.
- Open each fan to a little more than a quarter circle, like a wide triangle.
- Cut 12 in (30 cm) of thread, fold it in half and lay it on the table as a vertical line with the fold at the top.
- Glue the largest fan to the lower end of the doubled thread, bound point upward. Glue the middle fan above it so it overlaps the point of the first by about 1/2 in (1.3 cm), then the smallest fan above that.
- Add a dot of tacky glue wherever one tier overlaps the next, and let everything dry flat.
The folded end of the thread above the top tier is your hanging loop. The finished tree stands about 3 1/2 in (9 cm) tall.
Fixing common problems
- The rosette pops open. The center needs more glue, a larger card circle, or longer under the book.
- The rosette will not lie flat. The strip is too short for its width. Add a second strip to the ring.
- Pleats wander off square. Mark both edges of the strip, not just one.
- Folds look cracked. The paper is too heavy for pleating.
Decorating and pairing
Pleats already catch the light, so a little decoration goes a long way: a button center or a punched star at the top of the tree. You will find more options among these ornament embellishment ideas. Buttons and beads are small parts, so keep them away from young children and pets.
Rosettes look good hung beside flatter shapes. Try them with strip-built paper snowflake ornaments in the same colors, or use leftover paper for paper cone tree ornaments. Store pleated ornaments in a rigid box in a cool, dry place away from damp and direct sun, with nothing resting on top of them.
Frequently asked questions
How long should the strip be for a paper rosette?
A good starting point is a strip about eight times as long as it is wide, so 12 in (30 cm) for a strip 1 1/2 in (4 cm) wide. If the ring will not flatten without straining, it is too short; glue on a second pleated strip to give it more room.
What paper weight works best for pleated ornaments?
Medium-weight paper is the easiest to work with: scrapbook paper, sturdy gift wrap or light cardstock. Thin copy paper holds a pleat but sags once it hangs, while heavy cardstock tends to crack along the folds and puts a lot of strain on the glued center of a rosette.
Why does my rosette keep springing open?
The pleats are pushing against a center that is not held firmly enough. Use thick tacky glue instead of a glue stick, cover a card circle generously, and keep the rosette flat under a small book until the glue has gripped. A second circle on the front adds more hold.