Paper Strip Ball Ornament: A Simple Sphere From Strips
Cut ten equal cardstock strips, punch a hole at each end, pin them with paper fasteners or thread and beads, and fan them out into a round ornament. Includes a strip length and ball size chart.
Tutorial at a glance
Materials
- Medium-weight cardstock
- Ruler and pencil
- Scissors or paper trimmer
- Standard hole punch
- Two paper fasteners, or strong thread and two wooden beads
- White craft glue (optional)
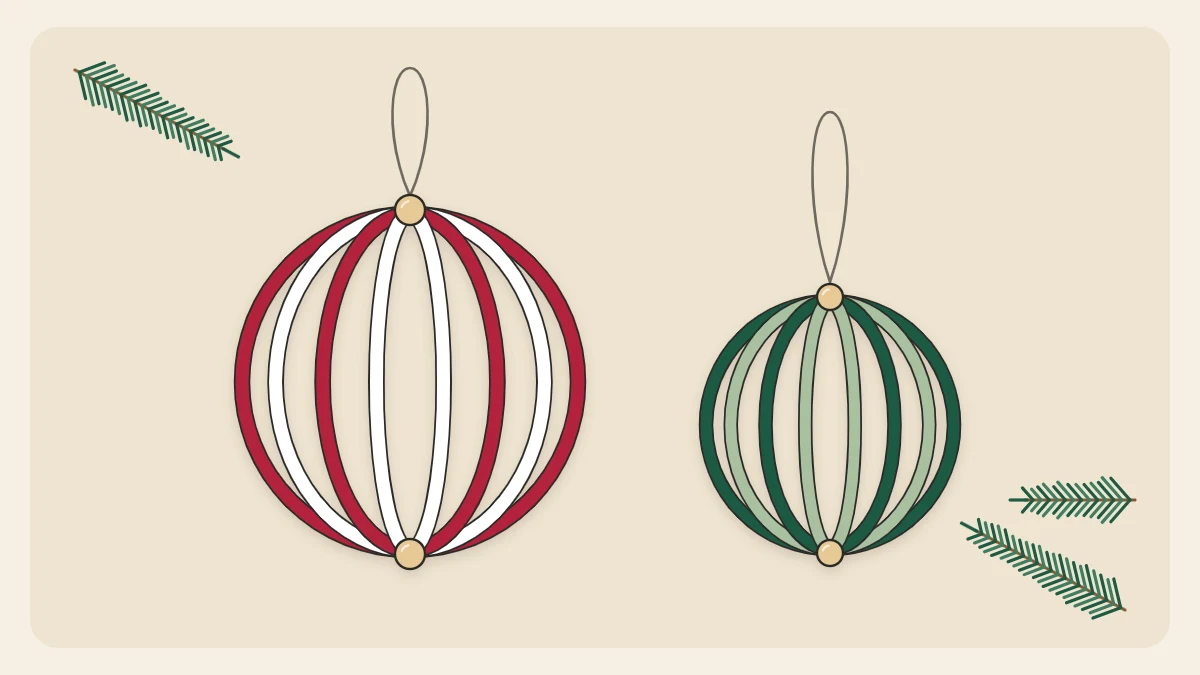
A paper strip ball ornament looks far more complicated than it is. Ten strips of cardstock are stacked, pinned together at both ends, and fanned out like the ribs of a globe. There is no template to draw and no tricky cutting.
There are two ways to hold the strips together. Paper fasteners are quickest. Thread and two beads take a few minutes longer, use no metal, and give you the hanging loop for free.
What you need
- One letter-size sheet of medium-weight cardstock, or half a sheet in each of two colors
- Ruler and pencil
- Scissors or a paper trimmer
- A standard hole punch, which makes a hole about 1/4 in (6 mm) across
- Either two paper fasteners with legs at least 1/2 in (1.3 cm) long, or 24 in (60 cm) of strong thread or thin twine and two wooden beads about 1/2 in (12 mm) across
- A little white craft glue (optional)
Scissors and paper trimmers are adult tools. Beads and fasteners are small parts, so keep them away from young children and pets.
Strip length and ball size
The length of the strips sets the size of the ball. Each strip curves from the top of the sphere to the bottom, so the ball ends up a little more than half as wide as the strips are long.
| Strip length | Strip width | Finished ball |
|---|---|---|
| 4 1/2 in (11.5 cm) | 3/8 in (1 cm) | About 2 1/4 in (6 cm) across |
| 6 in (15 cm) | 1/2 in (1.3 cm) | About 3 1/4 in (8.5 cm) across |
| 8 in (20 cm) | 5/8 in (1.5 cm) | About 4 1/2 in (11.5 cm) across |
The steps below use the middle size. Eight strips make an open, airy ball, ten is a good balance, and twelve look fuller. More than twelve become hard to punch and pin neatly.
Cut and punch the strips
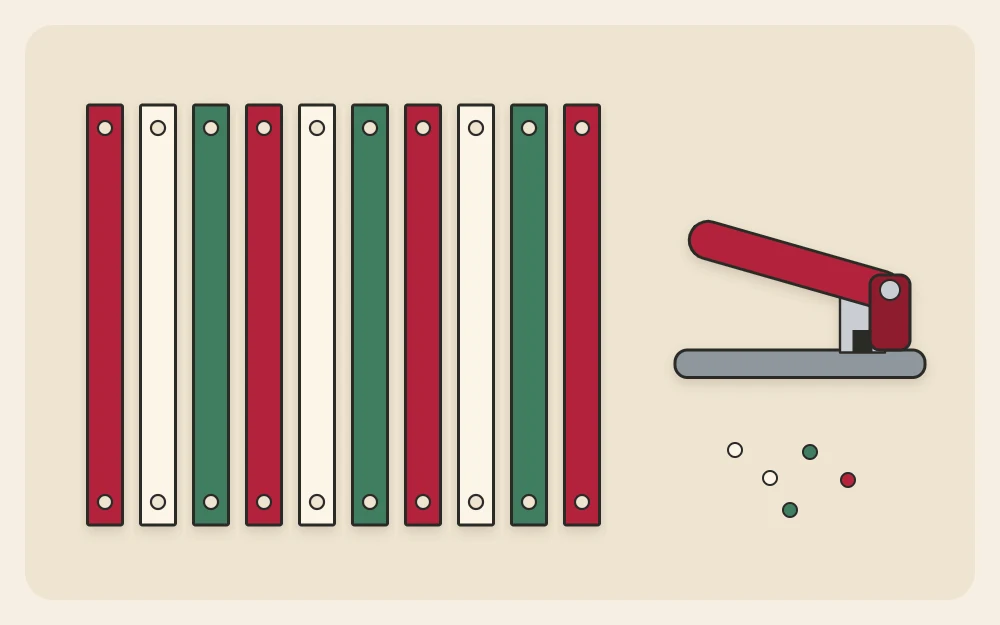
- On the back of the cardstock, rule ten strips, each 1/2 in (1.3 cm) wide and 6 in (15 cm) long. Cut them out, keeping the edges as straight as you can.
- On one strip, mark a dot in the middle of the width, 3/8 in (1 cm) from each end. Punch a hole on each dot.
- Use that strip as a guide. Lay it over each of the others in turn, line up the ends, and punch through its holes so every strip matches.
- Stack the ten strips with all the edges and holes lined up, colored side facing the same way.
Assemble with paper fasteners
- Push one fastener through the holes at one end of the stack and open its legs flat against the paper.
- Push the second fastener through the other end from the same side, so both heads sit on the same face of the stack. That face becomes the outside of the ball. Open the legs.
- Hold one fastener in each hand and bring your hands toward each other until the stack bows into a C shape, with the fastener heads on the outside of the curve.
- Keeping the curve, slide the top strip around to one side. Slide the next one a little less far, and continue until the strips are spread evenly all the way around.
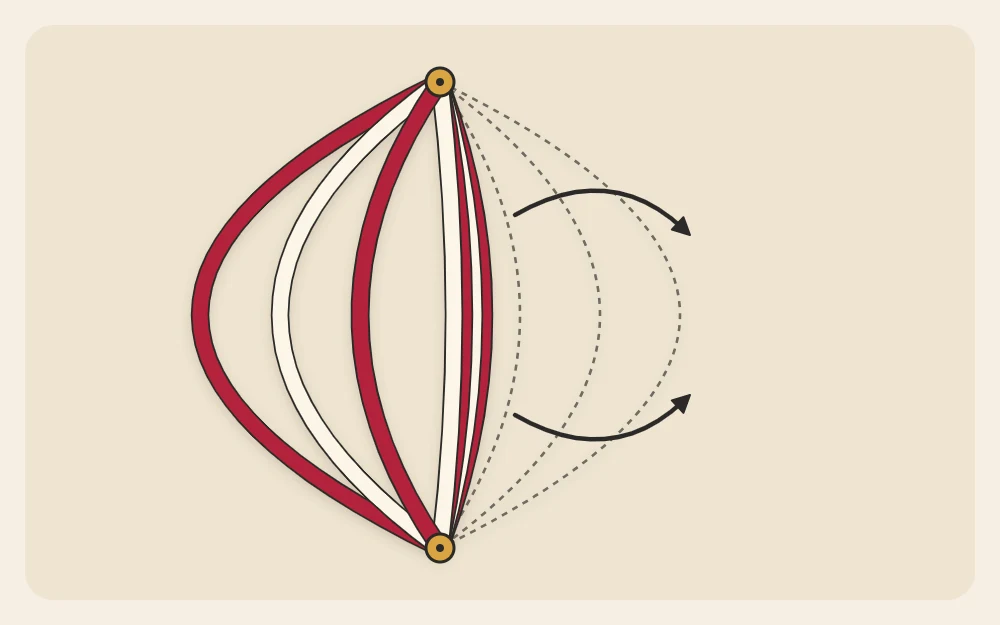
The fanned strips grip one another at each end, and that friction holds the sphere. To make it permanent, slip a tiny dot of white craft glue between the strip ends at the top and bottom and leave the ball to dry for about an hour.
For hanging, tie an 8 in (20 cm) piece of thread into a loop and hook it under the head of the top fastener, or pass it around one strip at the top.
The thread-and-bead version
Here the thread fixes the height of the ball, so the shape is very stable.
- Thread one bead onto the 24 in (60 cm) thread and slide it to the middle. Bring the two ends of the thread together so the bead hangs in the fold.
- Pass both ends together through the holes at one end of the stack, going in from the colored side. Pull through until the bead sits against the paper.
- Bend the stack into a C shape, colored side out, and pass both thread ends through the holes at the other end, this time from the plain side out to the colored side. The thread now runs through the middle of the curve.
- Thread both ends through the second bead and slide it down against the paper.
- Push the top bead down until the two beads are about 3 1/4 in (8.5 cm) apart, and fan the strips out evenly, as in the fastener version.
- When the ball looks round, tie the two thread ends together in a firm double knot tight against the top bead.
- Tie the ends together again about 3 in (7.5 cm) higher to make the hanging loop, and trim the tails.
Tip
If the knot slips through the bead, the bead hole is too large for your thread. Tie the knot around a short piece of toothpick, or switch to thicker twine.
Mixing two colors
The strips fan out in the order they are stacked, so the stacking order decides the pattern. Cut five strips in each of two colors and alternate them in the stack for even stripes, such as red and white. Stack five of one color followed by five of the other for a ball that is half and half.
Fixing common problems
- The ball is egg-shaped. In the thread version, the beads are too far apart or too close. Loosen the knot and adjust. In the fastener version, press the two ends gently toward each other.
- The strips crease instead of curving. The cardstock is too thin or the strips were bent sharply. Draw each strip once over the edge of a table to give it a gentle curl before stacking.
- The holes tear. They are too close to the end. Keep at least 1/4 in (6 mm) of paper between the hole and the tip of the strip.
Display and storage
Strip balls weigh almost nothing, so they sit well on thin branch tips. They pair nicely with flat shapes such as a layered paper star ornament or a row of paper cone tree ornaments.
They are hollow and will crush under weight. Give each ball its own compartment, with nothing stacked on top; the guide on how to store handmade ornaments has more on packing three-dimensional paper shapes.
Frequently asked questions
How many strips do I need for a paper ball ornament?
Between eight and twelve. Eight strips give an open, see-through ball, ten is a reliable middle choice, and twelve make a fuller sphere. Beyond twelve, the stack becomes thick enough that a standard hole punch and ordinary paper fasteners struggle to go through it cleanly.
How long should the strips be for a 3 inch paper ball?
Cut strips about 6 inches (15 cm) long. Each strip curves halfway around the sphere, so the finished ball is a little more than half the strip length, roughly 3 1/4 inches (8.5 cm) across. Shorten the strips slightly if you need a ball closer to exactly 3 inches.
Can I make a paper strip ball without brads?
Yes. Run a doubled thread through a bead, through the holes at one end of the stack, through the holes at the other end and through a second bead. Knot the thread against the top bead to set the height of the ball, then use the remaining thread as the hanging loop.