Paper Cone Tree Ornaments: Small Trees to Hang
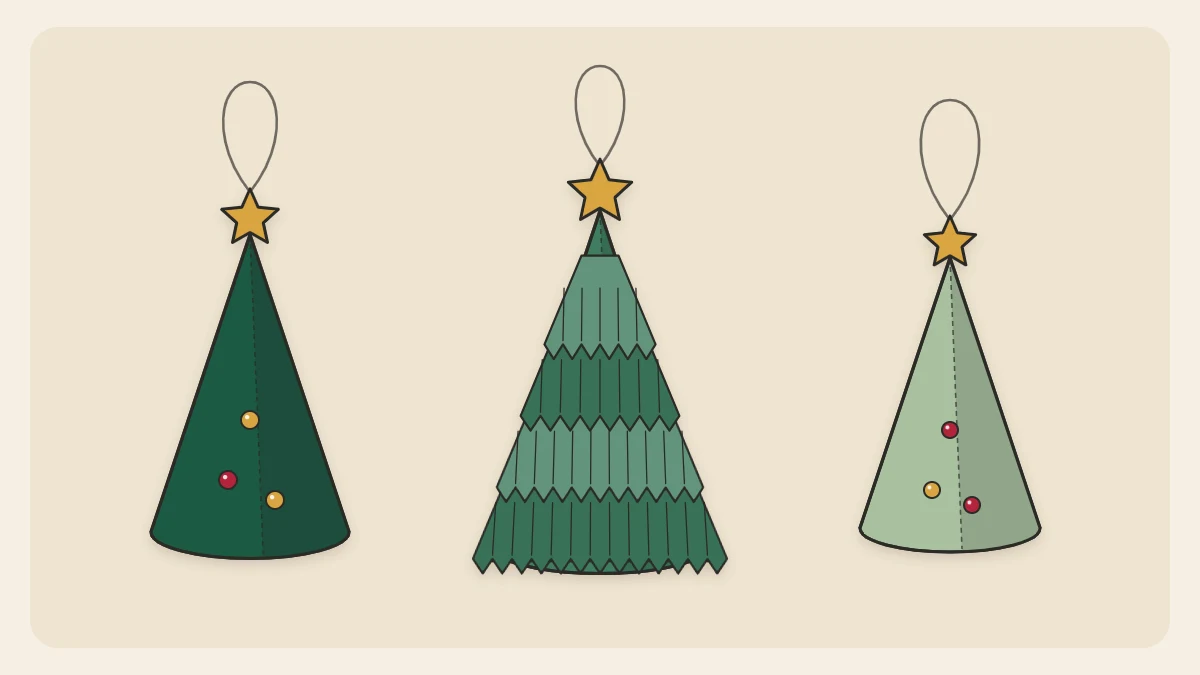
Roll a half or quarter circle of paper into a cone, add a thread loop through the tip, then dress it with fringed tiers, a punched dot garland and a tiny star.
Tutorial at a glance
Materials
- Green scrapbook paper or light cardstock
- Compass or a lid to trace
- Thick tacky glue
- 8 in (20 cm) of thin thread
- Needle and a small bead
- Thin paper for fringe
- Paper scraps for dots and stars
Paper cone tree ornaments are about as simple as a three-dimensional ornament gets: cut part of a circle, roll it, glue one seam. The cone is already tree-shaped, so everything after that is decoration.
What decides the look is the piece of circle you start with. A half circle rolls into a wide, squat tree, a quarter circle into a tall, slim one, and the radius sets the size. Once you know that, you can plan a matching set instead of guessing.
What you need
- Green scrapbook paper or light cardstock
- A compass, or a plate or lid to trace around
- Pencil, ruler and scissors (sharp scissors are an adult tool)
- Thick tacky glue or strong double-sided tape
- Thin thread or cord, about 8 in (20 cm) per tree
- A needle and a small bead for each tree
- Thinner paper for fringe, a hole punch and scraps for stars
Cone size from circle radius
The radius of your circle becomes the sloping side of the cone. A half circle makes a cone about as wide at the base as that radius. A quarter circle makes one only half as wide, and nearly as tall as the radius itself.
| Shape you cut | Radius | Base width | Height |
|---|---|---|---|
| Half circle | 3 in (7.5 cm) | About 3 in (7.5 cm) | About 2 1/2 in (6.5 cm) |
| Half circle | 4 in (10 cm) | About 4 in (10 cm) | About 3 1/2 in (9 cm) |
| Quarter circle | 4 in (10 cm) | About 2 in (5 cm) | About 3 3/4 in (9.5 cm) |
| Quarter circle | 5 in (12.5 cm) | About 2 1/2 in (6.5 cm) | About 4 3/4 in (12 cm) |
The glued overlap makes each cone a touch narrower than these figures. For hanging on a tree, the two smaller sizes are the most useful; larger cones look better standing on a shelf.
Roll and glue the cone
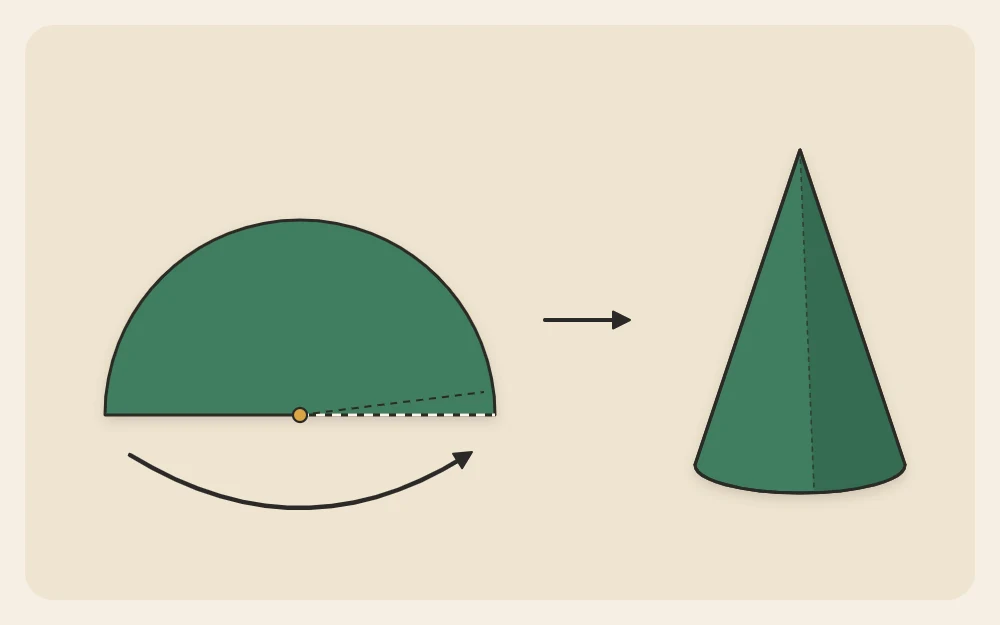
- Draw a circle of the radius you chose and cut it out. Cut it in half through the center for two wide cones, or into quarters for four slim ones.
- Pull the piece gently over the edge of a table, colored side up, a few times. This pre-curls the paper so it rolls smoothly instead of creasing.
- Roll the two straight edges toward each other until one overlaps the other by about 3/8 in (1 cm) at the base. Keep the point tight and closed.
- Check that the base edge lines up all the way around, then run a thin line of tacky glue along the overlap.
- Press the seam from the inside with a finger or a pencil and hold it for about a minute. A paper clip at the base keeps it closed while it dries.
Tip
If the cone will not sit level, stand it on the table and look at the base. Trim any corner that sticks down at the seam with small snips until the cone stands straight.
Add the hanging loop
The loop goes through the tip, and something inside the cone stops it from pulling out. Add it before you decorate, while you can still handle the cone freely.
- Snip the very tip off the cone, no more than 1/16 in (2 mm), to open a tiny hole.
- Fold 8 in (20 cm) of thread in half. Slide a small bead onto both cut ends together and tie them in a double knot below it. If you have no bead, tie three or four knots on top of each other to make one bulky knot.
- Push the folded end of the thread a short way through the eye of a needle.
- Pass the needle up through the cone from the inside and out through the hole. Pull the loop through and slip the needle off.
- Draw the loop up until the bead sits snugly inside the tip. A dot of glue dropped inside the point holds it there.
Needles are sharp and beads are small parts, so an adult should handle this step and keep loose beads away from young children and pets.
Fringed tiers
Fringe turns a plain cone into a shaggy little fir. Use thinner paper for this than for the cone itself; it curls outward more readily.
- Cut strips 1 in (2.5 cm) wide. You need enough length to circle the cone three or four times in total.
- Snip each strip into fringe along one long edge, cutting every 1/8 in (3 mm) and stopping 1/4 in (6 mm) from the other edge. That uncut band is what you glue.
- Starting at the back seam, glue the band of the first strip around the cone so the fringe hangs just past the base. Trim the strip where it meets its own start.
- Glue the next strip higher up, so its fringe covers the band of the one below. Carry on to the tip, finishing with a short piece wrapped around the point.
- Curl the fringe outward by running it lightly between your thumb and a pencil.
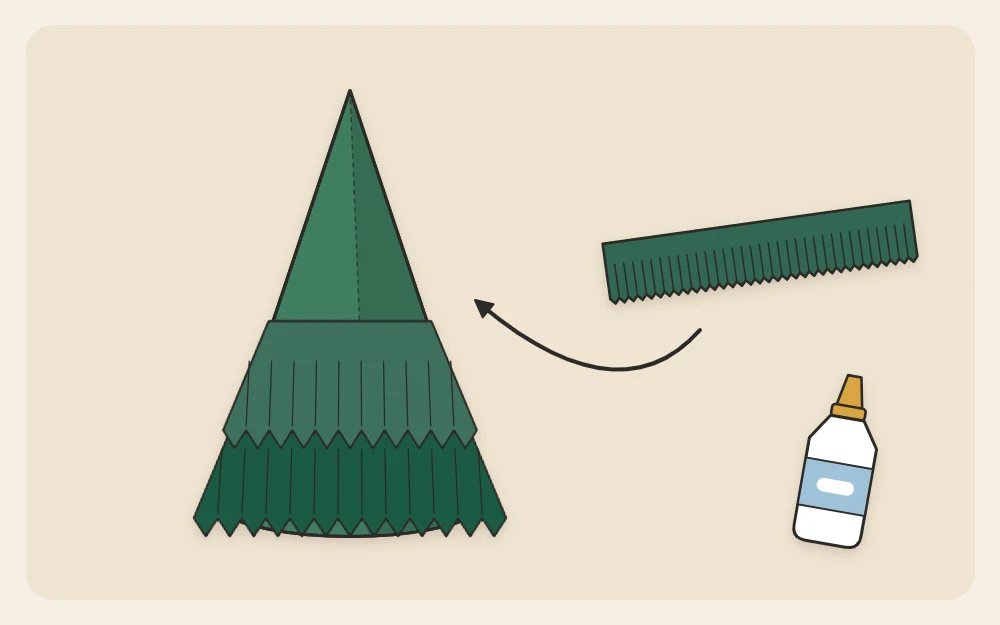
A straight strip tends to climb slightly as it goes around a cone. Let it; ease the band into place a little at a time and hide the join at the seam.
Dot garlands and a star on top
For a smooth tree, punch dots from bright paper scraps and glue them in a line that spirals from base to tip, like a string of baubles. Space them about 3/8 in (1 cm) apart and use a toothpick to place the glue.
To top the tree, cut two matching stars about 3/4 in (2 cm) across and glue them back to back with the thread loop sandwiched between, resting on the tip. If you would rather give the star more shape, the paper star ornament tutorial covers larger versions.
Hanging and storing
Cones are light, so they suit the thin outer tips of branches where heavier ornaments would sag. They mix well with round shapes such as a paper strip ball ornament, and a soft felt tree ornament in the same green ties the set together.
Plain cones nest inside each other for storage. Fringed ones need their own space in a rigid box, kept in a cool, dry place away from damp and direct sun.
Frequently asked questions
Should I use a half circle or a quarter circle for a cone tree?
It depends on the shape you like. A half circle gives a wide tree roughly as broad as it is tall, which shows off fringe well. A quarter circle gives a slim, pointed tree that takes up less room on a branch and suits dot garlands and simple stars.
How do I stop the cone seam from popping open?
Pre-curl the paper over a table edge so it is not straining against the glue, overlap the edges by about 3/8 in (1 cm), and use thick tacky glue or strong double-sided tape. Hold the seam for a minute and leave a paper clip on the base until it is dry.
Can paper cone trees stand on a shelf instead of hanging?
Yes. Skip the thread loop and make sure the base is trimmed level so the cone stands straight. Larger cones cut from a radius of 5 in (12.5 cm) or more look best standing, and a group in three heights makes a simple display for a mantel or windowsill.