Felt Tree Ornament: A Layered Tree With Simple Stitches
Sew a stuffed felt tree with three scalloped tiers, bead or French-knot baubles, a brown trunk and a ribbon loop, using running stitch and blanket stitch.
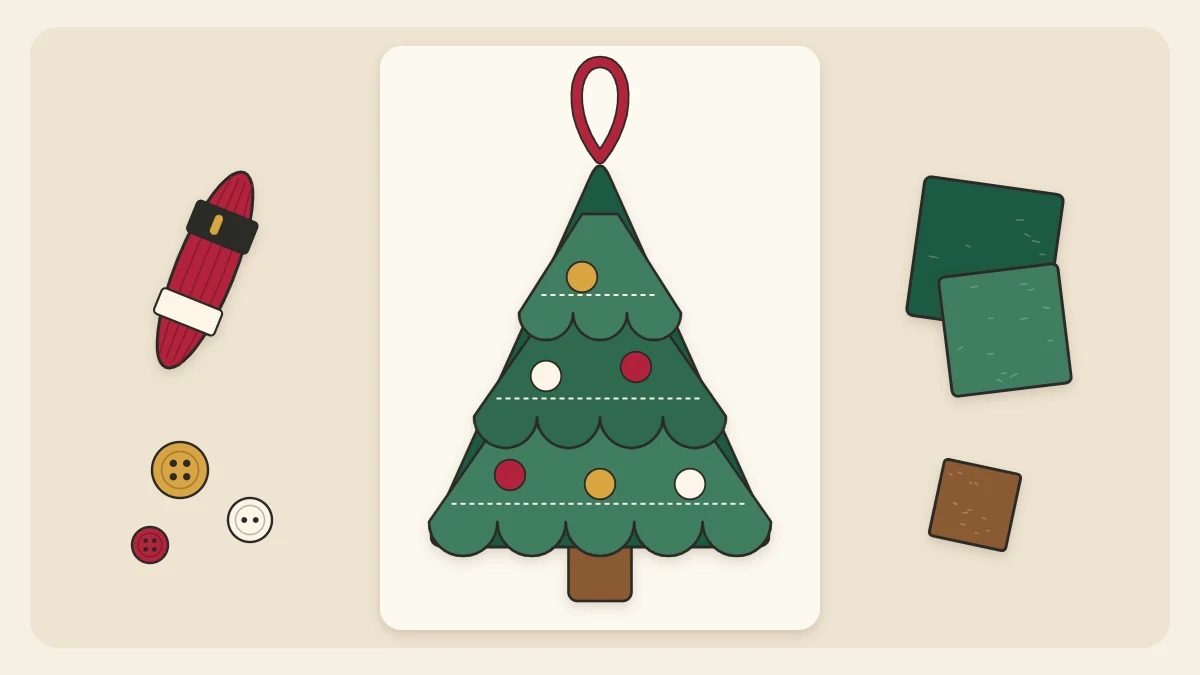
Tutorial at a glance
Materials
- Dark green felt, 6 x 5 in (15 x 13 cm)
- Light green felt, 4 x 3 in (10 x 7.5 cm)
- Scrap of brown felt
- Cream and green embroidery floss
- Small beads or red floss
- 7 in (18 cm) of narrow ribbon
- Polyester fiberfill
This felt tree ornament is a plain stuffed triangle made special by what goes on the front: three scalloped tiers in a lighter green, a scattering of tiny “baubles” and a stubby brown trunk peeking out of the seam. All the decoration is sewn on before the tree is assembled, so you are always working on one flat layer.
The stitches are running stitch, blanket stitch and an optional French knot. If any of those are new to you, read through the felt ornament basics first, then come back and follow the steps below.
What you need
- Dark green felt, about 6 x 5 in (15 x 13 cm)
- Light green felt, about 4 x 3 in (10 x 7.5 cm)
- A scrap of brown felt
- Embroidery floss in cream or white, and in green to match the tree
- Embroidery needle, pins and sharp scissors (adult tools)
- Six to nine small beads, or red and gold floss for French knots
- 7 in (18 cm) of narrow red ribbon
- A small handful of polyester fiberfill
- Paper and pencil for the template
Draw the template and cut the pieces
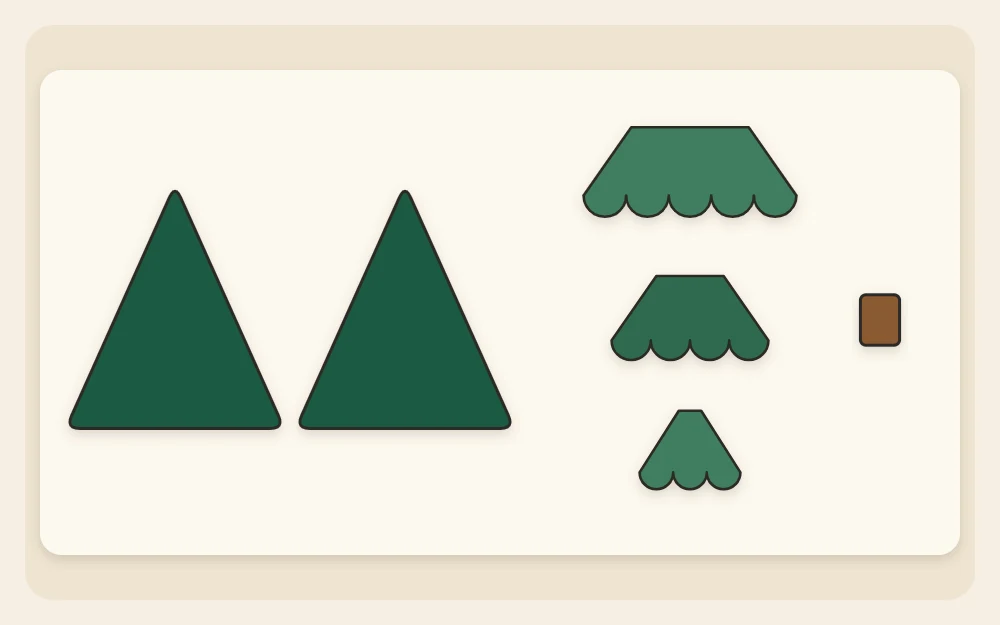
On paper, draw a triangle 3 1/2 in (9 cm) wide at the base and 4 1/2 in (11.5 cm) tall, with the point centered over the base. Round the three corners slightly; soft corners are easier to stitch and stuff than sharp ones.
- Pin the template to the dark green felt and cut two tree bodies. Turn the template upside down for the second one to save felt.
- From light green felt, cut three strips: 3 1/2 x 1 in (9 x 2.5 cm), 2 1/2 x 1 in (6.5 x 2.5 cm) and 1 1/2 x 3/4 in (4 x 2 cm).
- Cut one long edge of each strip into scallops. Make four on the longest strip, three on the middle one and two on the shortest. Tracing around a small coin gives even curves.
- Cut a brown rectangle 3/4 x 1 in (2 x 2.5 cm) for the trunk.
Stitch the tiers to the front
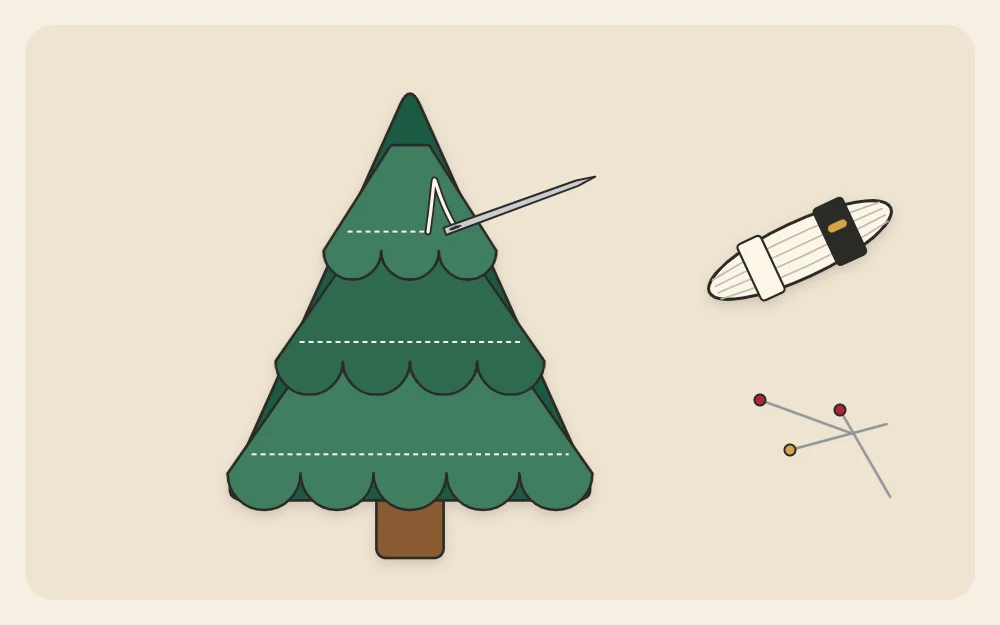
Choose one tree body as the front. The tiers are sewn along their straight top edges only, so the scallops stay free and lift slightly like branches.
- Lay the longest strip across the front with its scallops pointing down and their lowest points about 1/4 in (6 mm) above the base. Pin it.
- Thread the needle with two strands of cream floss and knot the end. Starting from the back, sew a line of running stitch along the straight top edge of the strip, about 1/8 in (3 mm) below it. Keep stitches and gaps about 1/8 in (3 mm) long.
- Finish with a small knot on the back.
- Pin the middle strip so its scallops sit about 1/4 in (6 mm) above the stitching of the first, and sew it the same way.
- Add the shortest strip above that, leaving roughly 1 in (2.5 cm) of plain tree showing at the tip.
- Turn the front over. Using the tree body as a guide, trim the ends of each strip so they follow the sloping sides exactly.
Tip
Strips cut a little too wide are a help, not a mistake. Stitch them on with the ends overhanging, then trim; the tiers will match the tree edge far better than pieces cut to an exact size.
Add the baubles
Decorate while the front is still a single layer, so every knot ends up hidden inside. Place two or three baubles on each tier, on the scallops below the stitching line.
Beads: bring the needle up from the back, slide on a bead, and go down right beside where you came up. Pass through each bead twice so it sits firmly.
French knots: use three strands of floss. Bring the needle up, hold the floss taut with your other hand and wrap it twice around the needle. Still holding the floss, push the needle back down a thread’s width from where it came up, and pull through slowly until the knot tightens on the surface.
Beads are small parts. If the ornament will hang within reach of young children or pets, French knots are the better choice. For other trims, such as sequins or a stitched star at the tip, see these ornament embellishment ideas.
Assemble with trunk and loop
- Lay the back tree body down. Place the trunk at the center of the base so 3/8 in (1 cm) lies on the felt and the rest hangs below.
- Fold the ribbon in half and lay its two cut ends on the tip, 3/8 in (1 cm) in from the point, with the loop extending above.
- Set the decorated front on top, edges matching, and pin through all layers at the trunk and the loop.
- Thread two strands of green floss. Start partway up one sloping side: bring the needle out through the front from between the layers so the knot is hidden.
- Work blanket stitch around the edge, about 1/8 in (3 mm) deep and 1/8 in (3 mm) apart. Where a tier meets the edge, stitch through it as well so its ends are held down.
- At the tip, make two or three stitches straight through the front, both ribbon ends and the back. Across the base, the stitches that cross the trunk go through all three layers.
- Stop when a gap of about 1 1/4 in (3 cm) remains on the side where you began.
Stuff and close
Feed in small pinches of fiberfill, pushing the first ones into the tip and the two base corners with the blunt end of a pencil. Stop while the tree is still softly padded, about 3/8 in (1 cm) thick in the middle.
Pinch the gap closed and continue the blanket stitch to meet your first stitch. Knot twice at the back, pass the needle between the layers, bring it out an inch away and snip the floss so the tail vanishes inside.
Finished size and variations
The finished tree is about 3 1/2 in (9 cm) wide and 5 in (13 cm) tall including the trunk, plus the loop. To scale it, enlarge or reduce the template and keep each tier strip slightly wider than the tree at the height where it sits.
- Cut the tiers from white felt for a snow-dusted tree.
- Swap scallops for a zigzag edge.
- Leave out the stuffing for a flat version.
Once the blanket stitch feels comfortable, the same edge and stuffing method carries straight over to a stuffed fabric star ornament to hang alongside.
Frequently asked questions
Can I glue the tiers on instead of stitching them?
Yes. Run a thin line of thick tacky glue along the top edge of each strip, press it in place and let it dry fully before sewing the edge; drying time depends on the product, so follow the label. You lose the decorative stitching, but the scallops still lift nicely.
Why sew the decorations on before joining the two tree pieces?
Working on the front alone lets the needle pass through one layer, keeps every knot on the inside and stops you from accidentally stitching the front to the back. Once the tree is closed and stuffed, there is no tidy way to hide the start and end of a thread.
What can I use if I do not have polyester fiberfill?
Finely snipped felt offcuts or scraps of yarn make a workable filling for an ornament this small, though the result is a little firmer and lumpier. You can also leave the tree unstuffed. Two layers of felt with tiers on the front already have enough body to hang well.