Twig Star Ornament: A Rustic Star Tied With Twine
Make a rustic five-point star from five dry twigs and jute twine. Learn how to choose and trim the twigs, weave them over and under, and bind each point so it stays tight.
Tutorial at a glance
Materials
- Five dry twigs, 6 in (15 cm) long
- About 2 yd (1.8 m) of jute twine
- Garden snips
- White craft glue or tacky glue (optional)
- Small faux or dried sprig (optional)
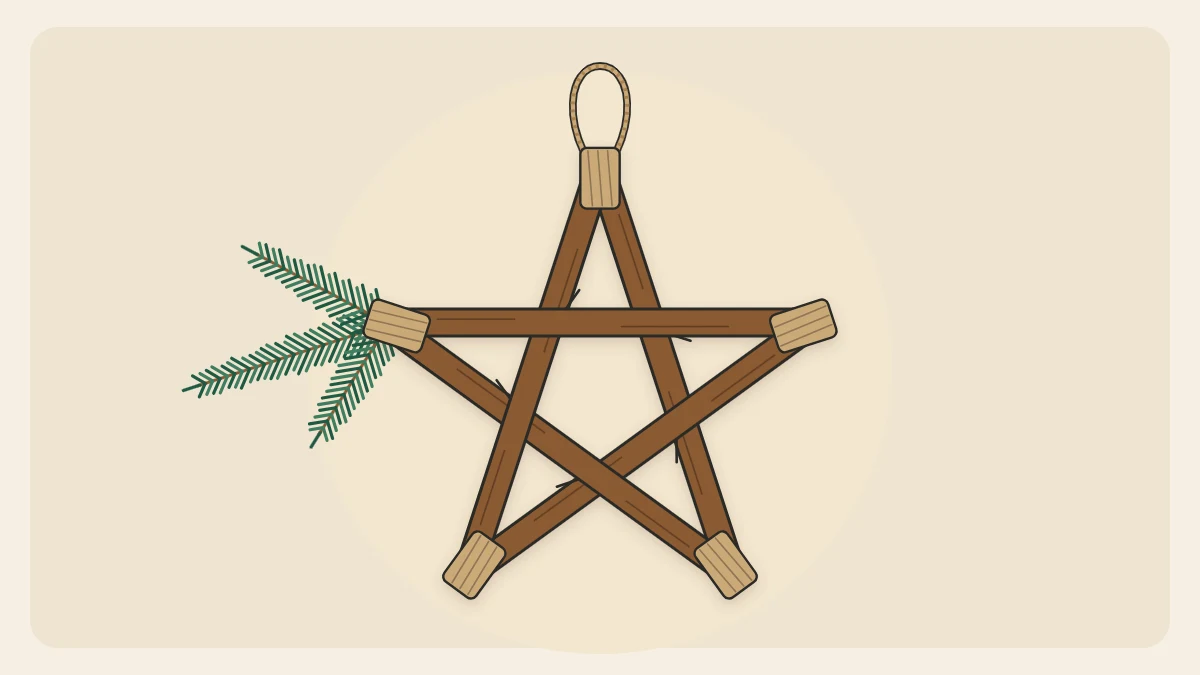
A twig star ornament is five sticks and a length of twine, nothing more, and it looks at home on any tree from plain to heavily decorated. The whole design depends on two things: twigs that are properly dry and bindings that are properly tight.
The steps below build a classic five-point star about 5 1/2 in (14 cm) across. Once you know the layout you can scale it up for a window or down for a gift tag.
What you need
- Five straight, dry twigs, each about 1/4 in (6 mm) thick or a little less
- Garden snips and a ruler
- Jute twine, about 2 yd (1.8 m) in total
- White craft glue or tacky glue (optional)
- Scissors
- A small sprig of faux or dried greenery (optional)
Garden snips are an adult tool. Children can help with choosing, measuring and wrapping.
Choosing and trimming the twigs
Pick up fallen twigs rather than cutting live ones. Fresh, green wood shrinks as it dries, and a binding that was tight on Monday will be loose by the weekend. A dry twig snaps cleanly when you bend a spare piece; a green one bends and stays bent.
- Straightness: roll each twig on a table. A gentle curve is fine; a kink is not.
- Thickness: keep all five similar, around the thickness of a pencil or thinner.
- Condition: firm bark, no soft spots, no crumbling.
Brush off dirt with a dry brush. If the twigs feel at all damp, leave them indoors on paper for a few days before you start.
- Snip off side shoots close to the stem.
- Measure 6 in (15 cm) on the first twig and cut it with the garden snips.
- Use that twig as the guide for the other four, so all five match exactly.
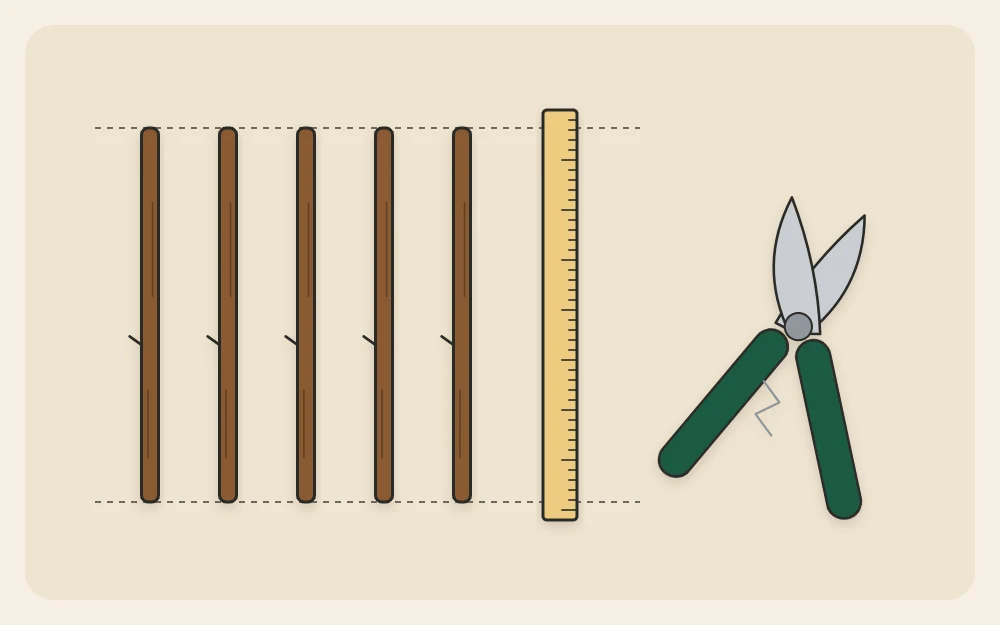
If bark and odd shapes are frustrating for younger makers, flat wooden sticks are easier to line up; see these craft stick ornaments for star and snowflake-inspired shapes.
Laying out the star
Arrange all five twigs before you tie anything. At every point, two twig ends cross and overlap by about 1/2 in (1.3 cm).
- Lay two twigs in an upside-down V. Where they cross is the top point.
- Place the third twig with one end crossing the bottom of the left twig, running up and across to where the right arm of the star will be.
- Lay the fourth twig horizontally, from that right arm across to the left arm.
- Place the fifth twig from the left arm down to the bottom of the right-hand twig of the V.
- Nudge the twigs until the five points are evenly spaced and the shape in the middle is a neat pentagon.
Weaving over and under
A star with all its twigs simply stacked is held together only by the bindings. Weaving locks the twigs against one another, so the star stays flat and stiff.
Each twig crosses two others in the middle of the star. Lift and slide the twigs so that every one passes over one of those twigs and under the other. Start with the horizontal twig: tuck it over one side of the V and under the other. Then adjust the last two until no twig lies entirely on top or entirely underneath.
The twigs will flex slightly and want to spring apart. That tension is what makes the finished star rigid; hold the layout flat with one hand while you bind the first point.
Binding each point
Cut five pieces of twine, each about 12 in (30 cm) long. Work the top point first, then go around the star.
- Tie one end of the twine around a single twig, right beside the crossing, with a double knot. Leave a tail about 2 in (5 cm) long.
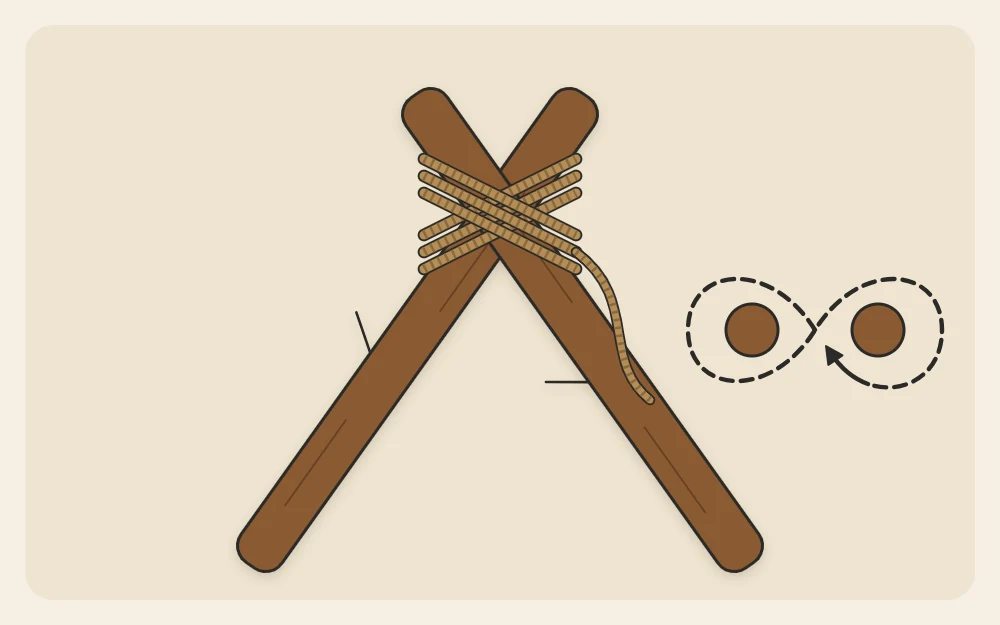
- Wrap the long end diagonally across the crossing three times, pulling firmly on every turn.
- Change direction and wrap three times across the other diagonal, so the wraps form an X on the front.
- Finish with two figure-eight turns: around one twig end, across the middle, then around the other twig end. These pull the X tight.
- Turn the star over and tie the working end to the tail with a square knot: right over left, then left over right. Trim the ends to about 1/4 in (6 mm).
- Check the layout, then bind the remaining four points in the same way.
Tip
For extra hold, put one small dab of craft glue between the two twigs at each point before you wrap. The twine hides it, and the star can be handled as soon as it is tied while the glue dries underneath.
Wrapping the center or adding a sprig
The plain star is finished at this point, but two small additions change its character.
- Wrapped center: tie a 1 yd (90 cm) length of twine to one corner of the inner pentagon. Take it around the pentagon, looping once around each crossing as you pass, for three or four rounds. Knot it at the back.
- Sprig: lay a short piece of faux or dried greenery, about 2 in (5 cm) long, against one point and bind its stem on with a few turns of twine and a square knot. A tiny cone from your pinecone ornaments supply can be tied on alongside it.
Hanging and looking after the star
For the loop, cut 8 in (20 cm) of twine, pass it behind the binding at the top point and knot the ends together. Other ways to hang a handmade piece are covered in the guide to ornament hanging loops.
Watch out
Twig ends can be sharp and bark sheds. Treat the star as decoration only and hang it where small children and pets cannot pull it down.
If a binding loosens after a season, cut it off and retie it rather than adding more twine on top. Store the star flat, wrapped in tissue, in a cool, dry place away from damp and direct sun.
Frequently asked questions
What kind of twigs are best for a twig star?
Any straight, dry, fallen twigs about as thick as a pencil or thinner will do. Birch, willow, dogwood and fruit-tree prunings are popular because they grow straight, but the species matters less than dryness. Avoid green wood, which shrinks and loosens the bindings, and anything brittle enough to crumble.
Why does my twig star wobble or twist out of shape?
Either the twigs are stacked instead of woven, or the bindings are loose. Make sure each twig goes over one neighbor and under the other, pull every wrap tight, and finish with figure-eight turns before knotting. A small dab of craft glue between the twigs at each point also helps.
Can I make the star in a different size?
Yes. The finished star is slightly narrower than the length of one twig, so choose the twig length to suit. Twigs of 4 in (10 cm) make a small ornament and need thinner sticks; 10 in (25 cm) twigs make a window star and can be a little thicker.