Ornament Hanging Loops: Ribbon, Twine and Thread Options
Choose the right ribbon, twine, thread or wire hook for a handmade ornament, cut it to a sensible length, attach it five different ways and find the balance point so it hangs straight.
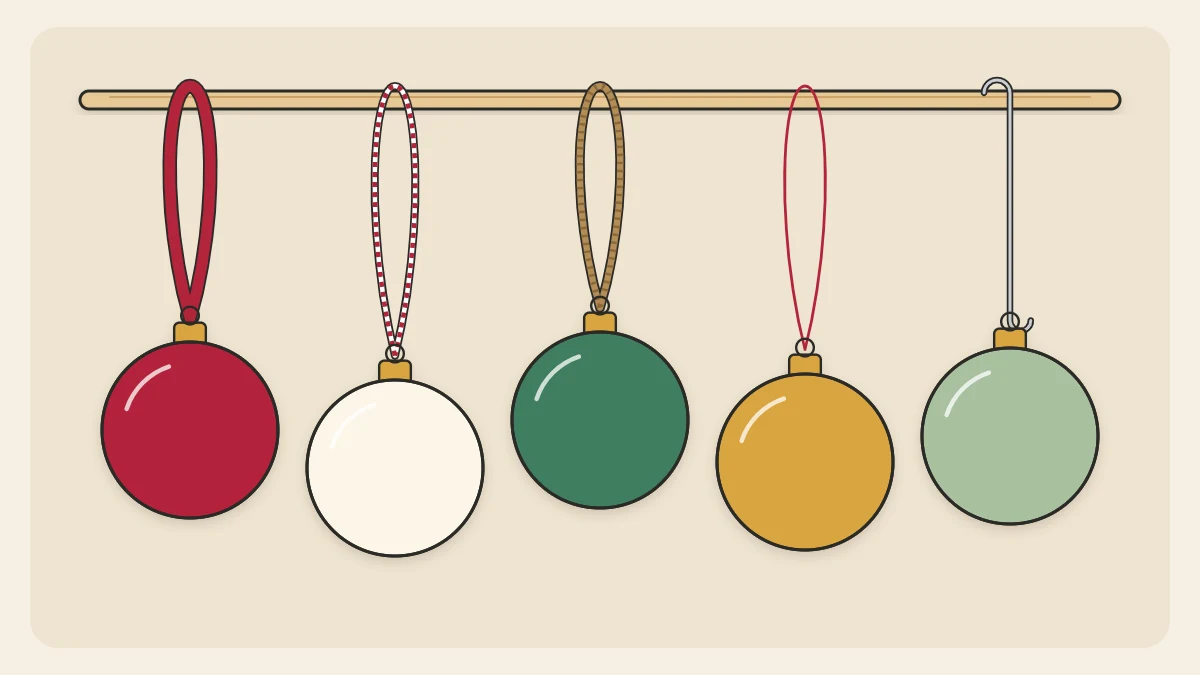
Ornament hanging loops tend to be the last thing anyone thinks about, usually when the glue is already dry and there is nowhere left to hide a knot. Planned from the start, the loop becomes part of the design: a satin ribbon dresses up a plain felt heart, and rough jute makes a painted wood slice look as if it came in from the garden.
This guide covers which material to choose, how long to cut it, five ways to attach it, and how to find the spot where your ornament hangs straight instead of tipping to one side.
Choosing a loop material
Pick the loop to suit the weight of the ornament first and its style second. A thin thread that is perfect for a paper star will look lost on a chunky wooden disc, and thick jute will tear straight through a small punched hole in cardstock.
| Material | Best for | Good to know |
|---|---|---|
| Narrow ribbon, 1/8 to 1/4 in (3 to 6 mm) | Felt, fabric and keepsake ornaments | Cut the ends at a slant and dab them with white craft glue to slow fraying |
| Baker’s twine | Paper, cardstock and light wood | Holds a knot well and adds a stripe of color |
| Jute or thin hemp cord | Wood slices, pinecones and rustic pieces | Sheds fibers, so thread it before you paint or seal nearby |
| Embroidery floss or strong thread | Very light paper and felt shapes | Almost invisible; use all six strands of floss for strength |
| Thin wire hook | Ornaments that already have a hole or a small eye | Lets you swap the hook later; cut ends are sharp |
How long to cut the loop
A finished loop of about 3 to 4 in (8 to 10 cm), measured around the whole circle, slips over most branch tips and leaves the ornament hanging just below the needles. To get there, cut a piece 7 to 8 in (18 to 20 cm) long. The extra length is used up by the knot and the two short tails.
Go a little longer, around 10 in (25 cm), for thick jute, for bulky knots, or for an ornament that will hang from a garland or a doorknob. Go shorter for mini ornaments on a tabletop tree.
Tip
Cut one loop, test it on a branch or a pencil, and adjust before you cut the rest. Then use that first piece as a measuring guide so a whole set hangs at the same height.
Five ways to attach a loop
The right method depends on what the ornament is made of and whether you can still get between its layers.
Through a punched hole
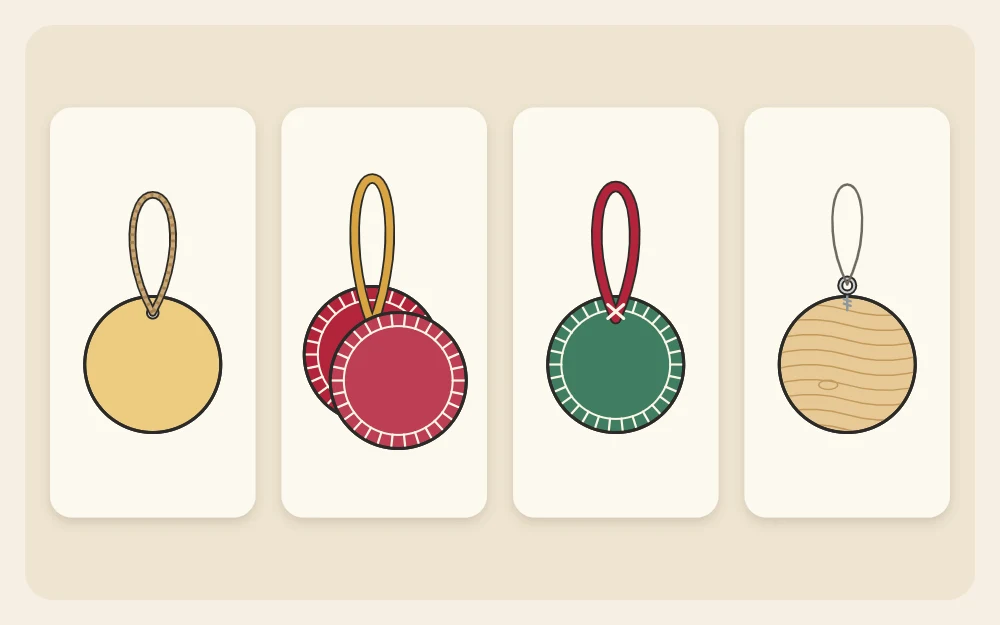
For paper, cardstock, thin wood shapes and air-dry clay, make a hole at least 1/4 in (6 mm) in from the edge so the material around it does not tear. Thread the loop through and knot the ends. In clay, make the hole with a drinking straw while the clay is still soft.
Sandwiched between layers
Felt and layered paper ornaments can hide the loop completely. Knot the ends, lay the knot about 1/2 in (1.3 cm) inside the top edge, add a dab of tacky glue, and close the front and back over it. The knot acts as an anchor, so the loop cannot slide out.
Stitched to the top edge
On a sewn ornament, fold the ribbon in half, tuck the raw ends between the layers and take three or four small stitches through everything in the same spot. Needles are adult tools, so help children with this step.
Tied around
Pinecones, twig bundles and cinnamon sticks have no place for a hole. Wrap the cord once around the top, under the first row of scales or around the middle of the bundle, knot it firmly, then tie the two tails together higher up to form the loop.
A small screw eye in wood
Thicker wood needs hardware. Start a tiny pilot hole in the top edge with a pushpin, then twist in a small screw eye by hand. This is a job for an adult, and the wood should be at least 1/4 in (6 mm) thick so it does not split. The method is shown step by step in the guide to wood slice ornaments.
Finding the balance point
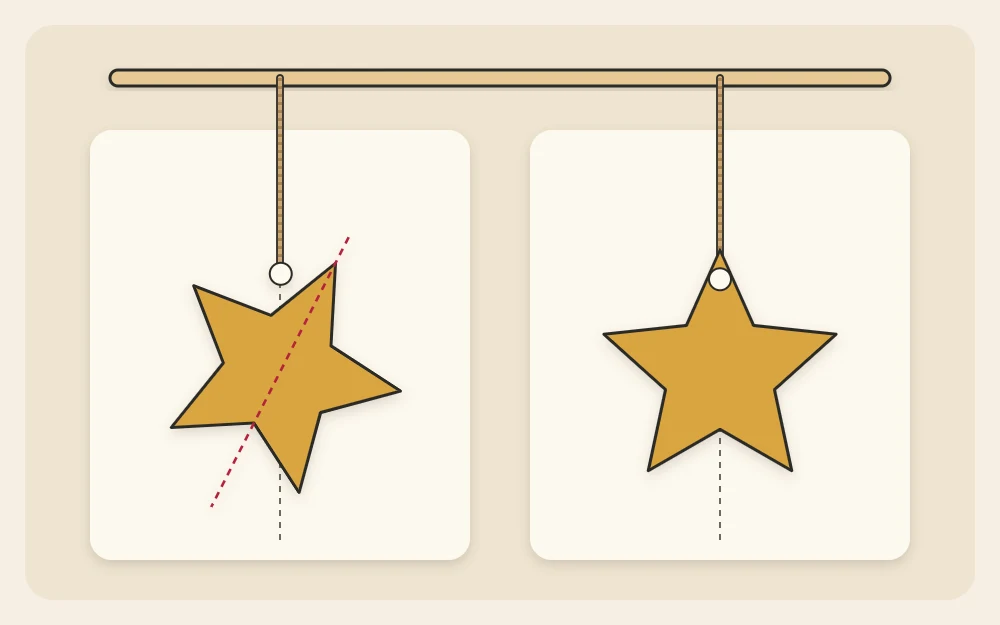
An ornament hangs straight only when the loop sits directly above its center of weight. On a symmetrical shape such as a circle or a heart, that is the middle of the top edge. On anything lopsided, such as a mitten, a stocking or a star with one heavy bead, it is not where your eye expects.
Test before you commit:
- Hold the ornament lightly between your thumb and finger at the top edge and let it dangle.
- If it tips, move your grip a little toward the side that drops, and try again.
- When it hangs level, mark the spot with a light pencil dot on the back.
- Tape the loop there for a final check, then attach it for good.
Add heavy decorations before this test, not after. Buttons and beads shift the balance, so settle your embellishment choices first.
Two knots worth knowing
Overhand loop. Hold the two cut ends side by side, treat them as a single strand, and tie one plain knot about 1/2 in (1.3 cm) from the tips. Pull it snug and trim the tails. This is the knot for nearly every ornament.
Lark’s head. Tie the overhand loop first. Push the folded end through the hole from front to back, pass the knotted end through that fold, and pull tight. The loop grips the edge of the ornament neatly, with no knot showing at the hole and nothing to glue.
Wire hooks
A hook is useful when you want to hang an ornament without tying anything permanent to it. Cut about 3 in (7.5 cm) of thin craft wire with wire cutters, bend a small closed curl at one end to catch the ornament, and a wider open curve at the other for the branch. Cutting and bending wire is an adult job, and the cut ends should be turned inward so they cannot scratch.
When to add the loop
Hidden loops go in during assembly, before the layers are closed. Loops through holes and screw eyes go on last, once paint and sealer are fully dry, so the cord stays clean and flexible. The order of those final steps is covered in how to finish and seal handmade ornaments.
Frequently asked questions
How long should a hanging loop be on a Christmas ornament?
A finished loop of about 3 to 4 inches (8 to 10 cm) around suits most tree branches. Cut the cord 7 to 8 inches (18 to 20 cm) long to allow for the knot and tails. Use shorter loops on mini ornaments for tabletop trees and longer ones for garlands or door handles.
Why does my handmade ornament hang crooked?
The loop is not above the ornament's center of weight. Dangle the ornament between your thumb and finger, shift your grip toward the side that drops until it hangs level, and mark that spot. Do this after adding buttons or beads, because heavy decorations move the balance point.
What is the strongest way to attach a loop to a felt ornament?
Knot the loop ends, place the knot about half an inch inside the top edge between the two felt layers, and stitch through all layers and the cord. The knot works as an anchor and the stitches stop it sliding, which holds better than glue alone on soft fabric.