Craft Stick Ornaments: Simple Stars, Trees and Sleds
Glue wooden craft sticks into a five-point star, a triangle tree with a trunk and a small sled. Clear overlap points, drying advice and simple ways to decorate.
Tutorial at a glance
Materials
- Wooden craft sticks, 4 to 6 per ornament
- White craft glue or tacky glue
- Parchment paper
- 10 in (25 cm) of twine per ornament
- Acrylic craft paint (optional)
- Fine sandpaper
Flat wooden sticks, a bottle of glue and a little patience while things dry: craft stick ornaments ask for nothing else. The sticks are already cut to matching lengths, so the shapes come out even without any measuring, and the plain wood takes paint, twine and trims beautifully.
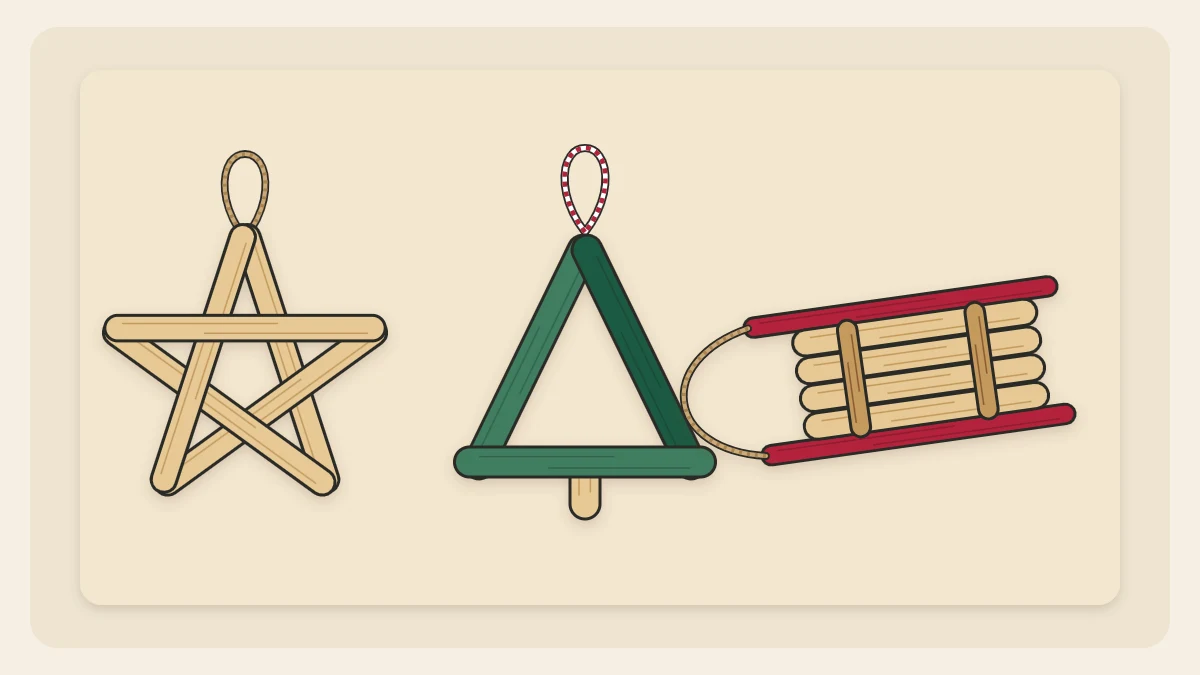
Here are three designs built from standard sticks about 4 1/2 in (11.5 cm) long and 3/8 in (1 cm) wide: a five-stick star, a triangle tree with a trunk and a small sled.
What you need
- Wooden craft sticks: 5 for the star, 4 for the tree, 6 for the sled
- White craft glue or thick tacky glue
- Parchment paper or a plastic sleeve to work on
- A light weight, such as a paperback book
- Twine, about 10 in (25 cm) per ornament
- Strong scissors or garden snips and fine sandpaper (tree trunk and sled only)
- Acrylic craft paint and a small brush (optional)
Pick the straightest sticks from the pack; warped ones leave gaps at the joints. Cutting sticks takes force and can send small pieces flying, so that step is for an adult.
Gluing basics
Every joint in these ornaments is one stick lying flat on another. Use a dot of glue about the size of a lentil, press the sticks together for about 30 seconds and wipe away anything that squeezes out.
Build on parchment paper so the ornament lifts off cleanly. Joints are usually firm enough to handle after about an hour and reach full strength overnight, but drying depends on the room and the product, so follow the label.
Five-stick star
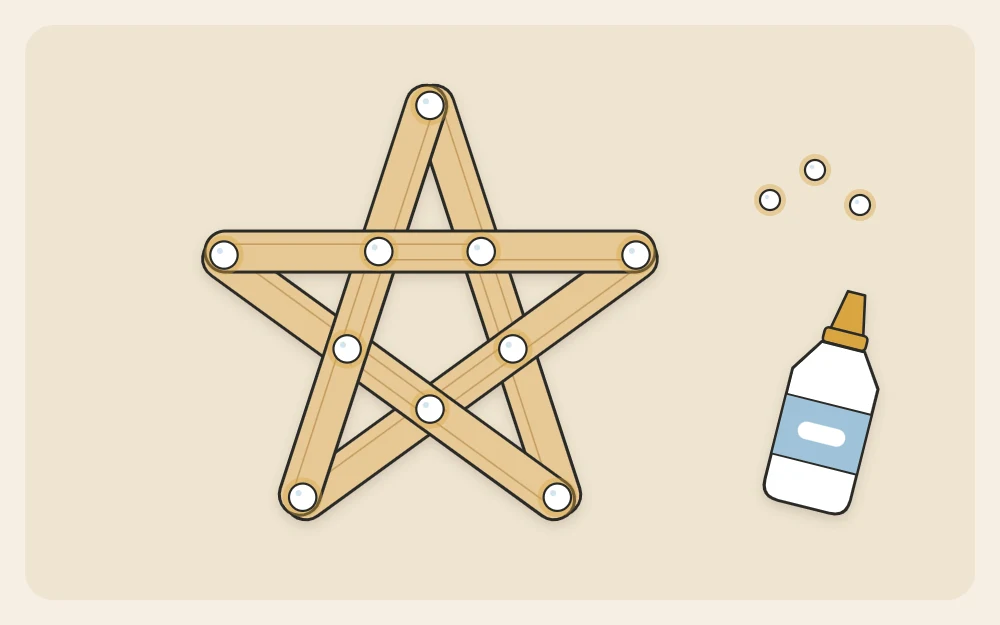
The star is five sticks arranged so that every stick end meets another stick end at a point. Lay it out dry first, then glue.
- Place two sticks in an upside-down V. Overlap their top ends by about 3/8 in (1 cm) to make the top point. Spread the bottom ends about 2 3/4 in (7 cm) apart.
- Take the third stick. Rest one end on the bottom of the left stick and angle it up to the right, across the V, so its other end sticks out to the right, a little above the middle of the V.
- Place the fourth stick as a mirror image: one end on the bottom of the right stick, the other end reaching up and out to the left.
- Lay the fifth stick horizontally across the upper part of the V, with its ends resting on the two free ends from steps 2 and 3. You should now see a five-point star.
- Nudge the sticks until the points are evenly spaced, then lift one stick end at a time, add a dot of glue and press it back down. Glue all five outer points.
- Add a small dot of glue anywhere two sticks touch where they cross in the middle. Some crossings will not touch, because the sticks sit at different heights; leave those alone.
- Cover with parchment paper, set the book on top and leave to dry.
The finished star is about 4 1/4 in (11 cm) across.
Triangle tree with a trunk
- Ask an adult to cut a piece about 1 1/2 in (4 cm) long from one stick for the trunk. Smooth the cut end with sandpaper.
- Lay one stick horizontally for the base of the tree.
- Lean two more sticks into a point above it. Their top ends overlap each other by about 3/8 in (1 cm) and their bottom ends rest on the ends of the base stick.
- Glue the three corners and press each one for about 30 seconds.
- Glue the trunk to the center of the base stick so that about 1 in (2.5 cm) hangs below it. Placing the trunk on top of the base, on the same side as the sloping sticks, keeps the back of the tree flat.
- Cover, weight and leave to dry.
The tree stands about 4 1/2 in (11.5 cm) tall including the trunk.
Small sled
The sled is built upside down in three flat layers: slats, crossbars, then runners.
- Ask an adult to cut two crossbars, each 1 1/4 in (3 cm) long, from one stick. Sand the cut ends.
- Lay three sticks side by side with their long edges touching. Push the middle one forward by about 1/2 in (12 mm) to shape the nose of the sled. These are the slats.
- Glue one crossbar across the three slats about 1 in (2.5 cm) from the front and the other about 1 in (2.5 cm) from the back. Let them grip for about 30 minutes.
- Run a line of glue along the top of each crossbar end. Lay the last two sticks on the crossbars as runners, one along each outer edge, parallel to the slats. Slide them forward so they extend about 1/2 in (12 mm) past the front of the outer slats.
- Weight lightly and leave to dry, then turn the sled over.
For the pull rope, use a 10 in (25 cm) piece of twine. The crossbars leave a narrow gap between the slats and the runners. Just ahead of the front crossbar, pass one end of the twine through that gap and knot it around a runner, then tie the other end to the second runner the same way. The rope doubles as the hanging loop, and the sled hangs nose up.
Tip
Painting is easier before assembly. Paint the sticks, let them dry fully, then glue. Lightly sand the spots where glue will go so it grips bare wood.
Paint, leave natural or decorate
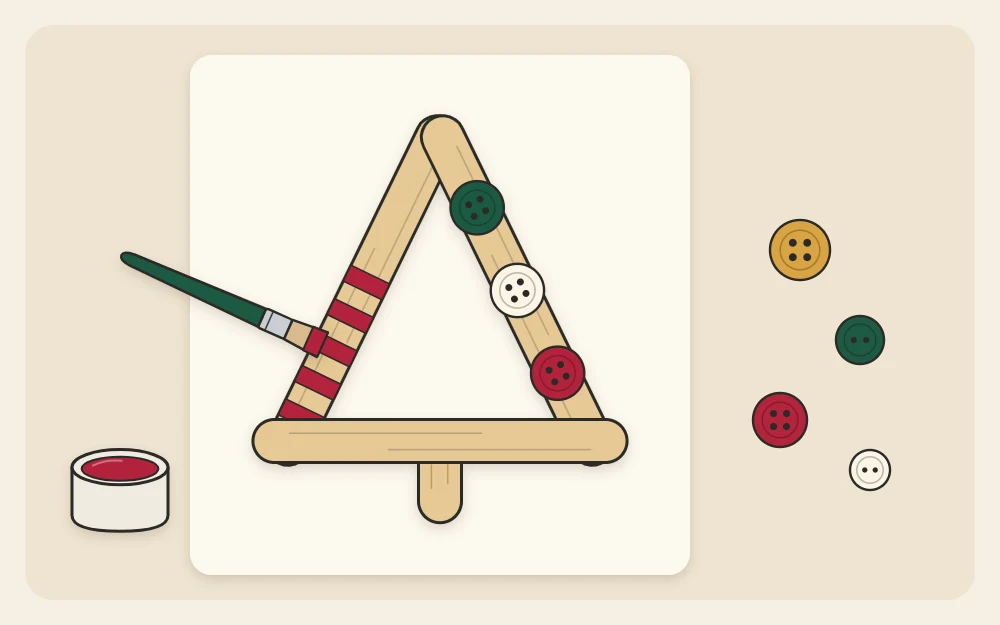
Bare wood with a red twine loop looks clean and rustic. For color, one or two thin coats of acrylic craft paint cover better than one thick coat. Stripes, dots and zigzags suit the narrow sticks; find more in the collection of painted ornament patterns.
Buttons, tiny pom-poms or sequins glued along the tree’s sides read as baubles. They are small parts, so keep them away from young children and pets. For more trims, see these ornament embellishment ideas.
Adding the twine loop
On the star and the tree, thread 10 in (25 cm) of twine through the gap just under the top point, where the two sticks overlap, and knot the ends together. If the gap is too tight, glue the knotted end of the loop to the back of the top point and let it dry flat before hanging.
If you like the look of these but prefer something gathered outdoors, the twig star ornament uses the same five-piece layout with bound joints.
Frequently asked questions
What glue works best on craft sticks?
White craft glue and thick tacky glue both bond bare wood well. Tacky glue grips a little sooner, which helps when sticks want to slide. Use a small dot at each joint, press for half a minute, and let the ornament dry flat under a light weight.
How long do craft stick ornaments take to dry?
Joints usually feel firm after about an hour, but the glue inside is still setting. Leaving the ornament flat overnight before painting or hanging is a dependable routine. Thick glue, cool rooms and humid air all slow things down, so check the label on your product.
Should I paint craft sticks before or after gluing?
Before is easier, because you can paint each stick flat without working around corners. Let the paint dry completely, then lightly sand the small areas where joints will sit so the glue touches bare wood. Touch up any marks once the ornament is assembled.