Painted Wooden Ornaments: Acrylic Basics for Blank Shapes
Learn the acrylic basics for painting blank wooden discs, stars and trees: sanding, thin base coats, painted edges, a crisp taped band and simple fixes for smudges and drips.
Tutorial at a glance
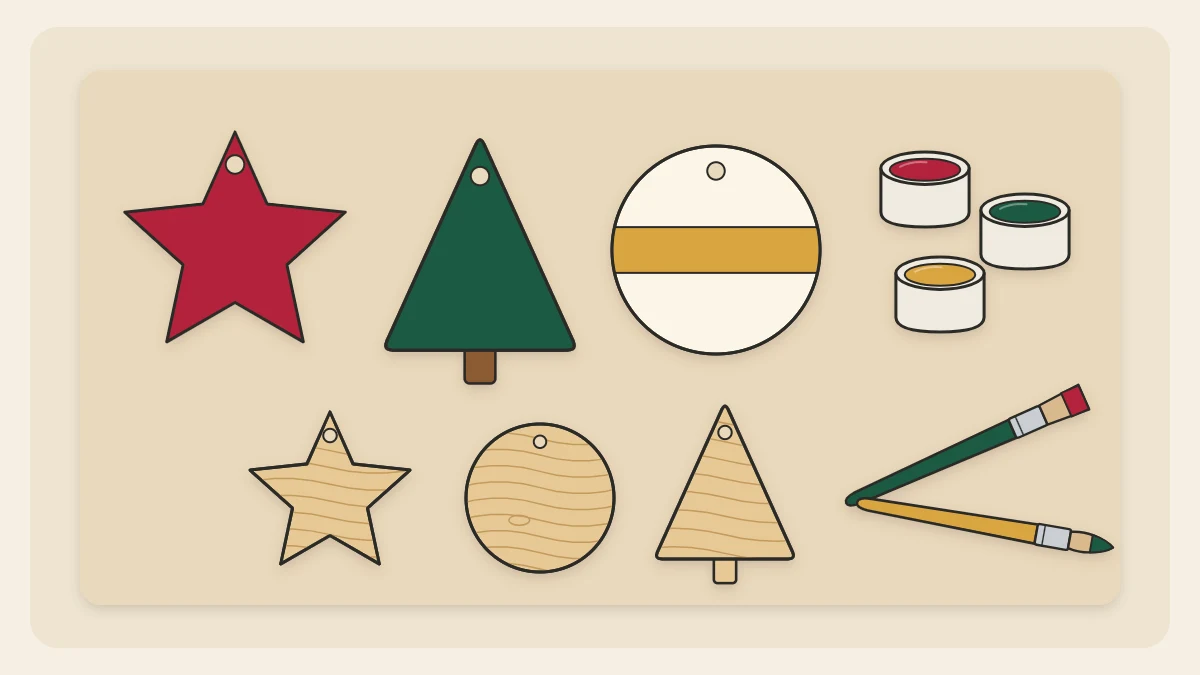
Materials
- Blank wooden discs, stars or trees
- Fine sandpaper, around 220 grit
- Acrylic craft paint
- Soft flat brush and small round brush
- Low-tack painter's tape
- Water-based brush-on sealer
- 8 in (20 cm) of ribbon or twine per ornament
Painted wooden ornaments start with the plain blank shapes sold in craft stores: thin discs, stars and trees, usually cut from plywood or basswood about 1/8 in (3 mm) thick. They cost little, they are light on a branch and they take paint well, provided you prepare the surface and build the color in thin layers.
This guide covers the basics that make the difference between a streaky shape and a clean, solid one: sanding, base coating, drying, painting the edges, masking a crisp band and fixing the small mistakes everyone makes.
What you need
- Blank wooden shapes, about 2 1/2 to 4 in (6 to 10 cm) across, with a hanging hole
- Fine sandpaper, around 220 grit
- Acrylic craft paint: white plus two or three colors
- A soft flat brush about 1/2 in (12 mm) wide and a small round brush
- Low-tack painter’s tape
- A jar of water, a paper towel, cotton swabs and a toothpick
- Scrap paper and four craft sticks to rest wet pieces on
- Water-based brush-on sealer and thin ribbon or twine for hanging
Flat versus round brushes
A flat brush has a straight, chisel-like edge. It lays down an even film of paint, so it is the one to use for base coats, bands and edges. A round brush comes to a point and suits dots, short lines and tidying corners, such as the inner angles of a star.
Soft synthetic bristles leave fewer brush marks than stiff ones. Rinse brushes before the paint dries in them, because dried acrylic paint is water resistant and very hard to remove.
Step 1: sand and dust
- Sand both faces lightly, moving the paper in the direction of the wood grain, until the surface feels smooth.
- Run the folded sandpaper once around the edges to knock off splinters left by the cutting.
- Wipe the shape with a dry cloth so no dust is left to mix into the paint.
Step 2: base coat in thin layers
The most common beginner mistake is trying to get full coverage in one thick coat. Thick paint dries slowly, holds brush ridges and can drip over the edge. Two or three thin coats look far better.
- Lay two craft sticks on scrap paper and rest the shape on them so it sits just clear of the surface.
- Dip only the bottom third of the flat brush in paint and wipe one side on the rim of the pot.
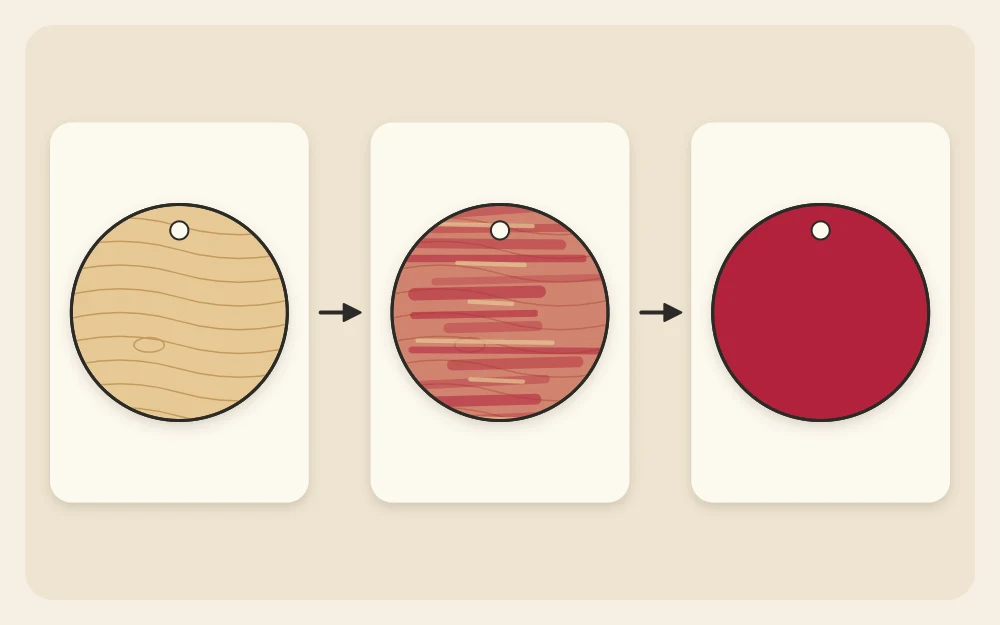
- Brush the first coat on in long strokes, all in the same direction. It will look streaky with wood showing through. That is correct; leave it alone.
- Let it dry to the touch at room temperature. This often takes about 15 to 30 minutes, but it depends on the room and the product, so follow the label.
- If the surface now feels slightly rough, that is the wood grain lifting as it absorbs water. Smooth it with two or three very light passes of sandpaper and wipe away the dust.
- Brush on a second coat. Add a third only if you can still see wood, which is more likely with yellow, red and other naturally sheer colors.
Tip
Painting a light or bright color? Start with one thin coat of white. It stops the wood tone from dulling the color and usually saves you a coat.
Step 3: paint the edges and the back
Bare edges are the detail that makes a painted shape look unfinished, and they show clearly once the ornament turns on its loop.
- While the front is still wet with each coat, run the flat brush around the edge, holding the shape by its faces at a dry spot or by a toothpick pushed through the hole.
- Check the hanging hole. If paint has filled it, twist a toothpick through to clear it before it dries.
- When the front and edges are dry to the touch, turn the shape over onto clean craft sticks and paint the back in the same thin coats.
Step 4: mask a crisp band
A straight band across a disc is the simplest decoration there is, and tape does the precise work for you.
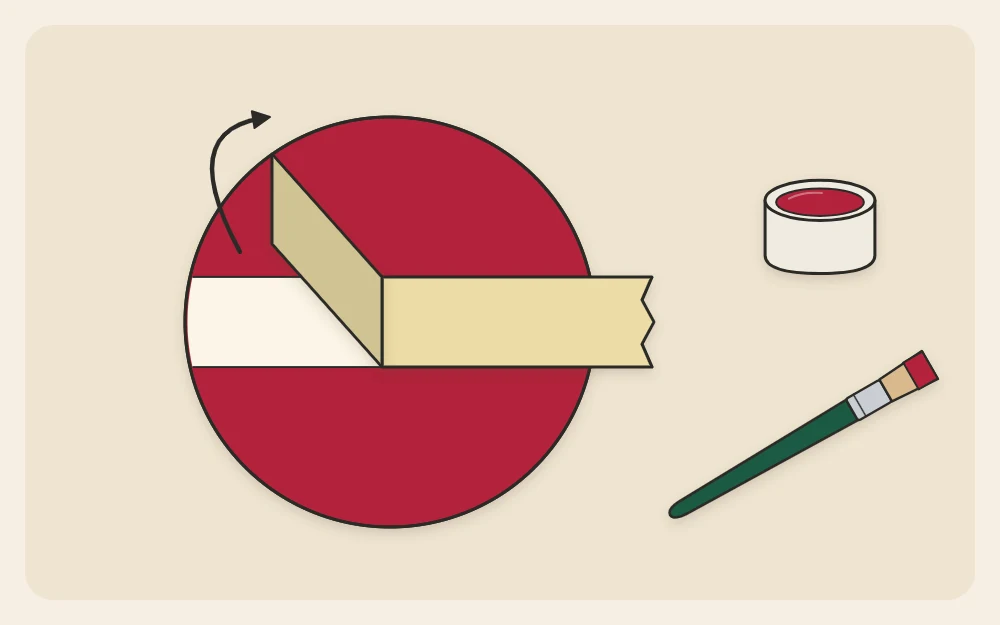
- Wait until the base coat is completely dry. Give it at least an hour, and longer in a cool or humid room, or the tape may lift the paint.
- Press each strip of tape against your sleeve once to reduce its grip, then lay two strips across the disc with a gap between them the width you want the band, such as 1/2 in (12 mm).
- Rub the inner edges of the tape down firmly with a fingernail.
- Brush a thin coat of the base color over the tape edges and let it dry. Any paint that creeps under the tape will match the base and seal the gap.
- Paint the band in two thin coats, brushing along the tape rather than against its edge.
- While the last coat is still slightly damp, peel each strip back slowly at a low angle.
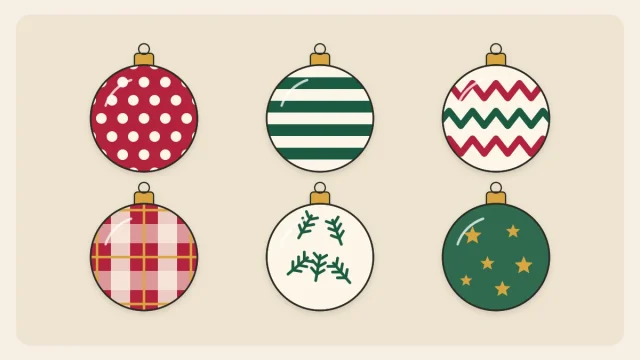
Once you are comfortable with a band, the library of painted ornament patterns shows how to add dots, zigzags, plaid and sprigs on top of a base coat.
Fixing mistakes
- A wet smudge or stray mark: lift it right away with a barely damp cotton swab, rolling the tip rather than rubbing.
- A dry mistake: do not pick at it. Let it dry fully, then paint over it with two thin coats of the base color and try again.
- A raised drip or ridge: wait until it is hard, sand it level with fine sandpaper, wipe off the dust and repaint that area.
- A fuzzy taped line: tidy it with the round brush and the base color, working up to the line from the base side.
Sealing and hanging
Leave the finished piece for about 24 hours so the paint hardens all the way through, then brush on a thin coat of water-based sealer, one face at a time. Sealing protects the paint from scuffs in storage and evens out the sheen. The guide on how to finish handmade ornaments explains the choice between matte, satin and gloss.
Thread 8 in (20 cm) of ribbon or twine through the hole and knot the ends. If you like the same painting methods on a more rustic base, try them on wood slice ornaments with the bark left on.
Frequently asked questions
Do you need to prime wooden ornaments before painting?
A separate primer is not essential for small craft shapes. A light sanding followed by a thin first coat of acrylic craft paint does the same job of sealing the surface. Under yellows, reds and other sheer colors, one thin coat of white first gives brighter results with fewer layers.
How long should acrylic paint dry between coats on wood?
Thin coats are often dry to the touch in roughly 15 to 30 minutes at room temperature, though cool or humid rooms slow that down. Check the product label, and test by touching an edge lightly. If the paint feels cool or tacky, give it longer before adding the next coat.
Why does my painted wood feel rough after the first coat?
Acrylic craft paint is water based, and the water makes loose wood fibers swell and stand up. It is normal on bare wood. Once the coat is dry, smooth the surface with two or three very light passes of fine sandpaper, wipe off the dust and continue with the second coat.