Air-Dry Clay Ornaments: Cut, Stamp, Dry and Paint
Roll air-dry clay to an even 1/4 in (6 mm), press in lace or a sprig, cut shapes, punch a hole with a straw and dry them flat. Then sand, paint and seal for light, decorative tree ornaments.

Tutorial at a glance
Materials
- White air-dry clay, about 9 oz (250 g)
- Small rolling pin and two 1/4 in (6 mm) guides
- Cutters or a cardstock template
- Lace, a sprig or a button for texture
- Drinking straw
- Fine sandpaper
- Acrylic craft paint and water-based brush-on sealer
- 8 in (20 cm) of ribbon per ornament
Air-dry clay ornaments are made much like cut-out cookies, except that the clay hardens by itself on a shelf over a day or two. You roll it, press a texture into it, cut a shape, poke a hole and wait. Once dry, the pieces are bright white, lightly chalky and ready for paint.
The method is simple, but two details decide how well the ornaments turn out: rolling the clay to an even thickness and drying it slowly and flat. Both are covered step by step below.
What you need
- White air-dry clay, about 9 oz (250 g), enough for roughly 6 to 8 ornaments
- A small rolling pin or a smooth straight-sided jar
- Two guides 1/4 in (6 mm) thick: square dowels, or two stacks of craft sticks taped together
- A silicone craft mat or a sheet of parchment paper to work on
- Cutters about 2 1/2 to 3 in (6 to 7.5 cm) across, or a cardstock template and a butter knife
- Texture items: a scrap of lace, an evergreen sprig, a button
- A drinking straw
- Fine sandpaper, around 220 grit or finer
- Acrylic craft paint, water-based brush-on sealer and ribbon
Keep any cutters and rolling pins used with clay for crafts only from now on.
Roll the clay to an even thickness
- Cut off about a third of the block and reseal the rest in its wrapper right away, since exposed clay starts to stiffen within minutes.
- Knead the piece in your hands for a minute until it is smooth and free of cracks.
- Press it into a thick pancake on the mat and lay one guide on each side, about 5 in (13 cm) apart.
- Roll with the ends of the pin resting on the guides. Keep rolling until the pin rides on both guides and no longer touches high spots in the clay. The sheet is now 1/4 in (6 mm) thick all over.
That thickness matters. Thinner pieces curl as they dry and snap easily; thicker ones take much longer to dry and feel heavy on a branch.
Press in a texture
Add texture before you cut. Pressing into a shape that has already been cut spreads it out of line.
- Lace: lay it flat on the clay and roll over it once with firm, even pressure, then peel it away.
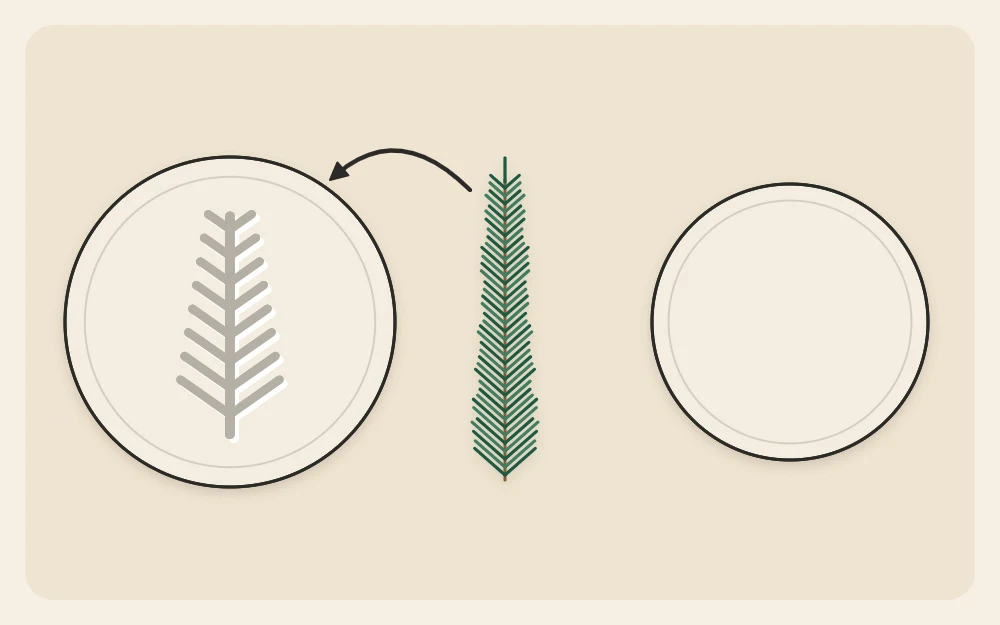
- A leaf sprig: place it vein side down, roll over it once and lift it out by the stem. Pick out any stray needles with a toothpick.
- A button: press it straight down about 1/16 in (2 mm) deep and lift straight up. Repeat for a border or an all-over print.
If the print is faint or doubled, ball the clay up, knead it and roll again. Nothing is wasted at this stage.
Cut the shapes and make the hole
- Press a cutter straight down through the clay, give it a tiny wiggle and lift. To use a template instead, lay it on the clay and cut around it with a butter knife held upright.
- Peel away the spare clay from around the shapes and leave the shapes where they are. Moving soft clay stretches it.
- Push a drinking straw straight down to punch the hanging hole, at least 1/4 in (6 mm) in from the edge. A hole closer than that leaves a weak bridge that can crack.
- Dip a fingertip in water, shake off the drops and run it lightly around the cut edge to smooth any roughness.
- Knead the offcuts together, roll again and cut more shapes.

Dry flat at room temperature
- Slide the parchment or mat, with the shapes still on it, onto a tray or a large book and put it somewhere out of the way, clear of direct sun and drafts.
- After about 12 hours, when the tops feel firm and look paler, turn each piece over gently. Turning lets both faces dry at the same rate, which is what keeps them flat.
- Leave them until they are an even chalky white and no longer feel cool to the touch. This usually takes a day or two in total, but it varies with the room, the thickness and the product, so follow the label.
Watch out
Do not try to speed up drying. Clay that dries quickly on the outside while the middle is still damp is the main cause of curling and cracks. Slow and even gives the flattest pieces.
Smooth the edges
Dry clay sands easily. Lay a sheet of fine sandpaper flat on scrap paper and rub each edge along it with light strokes, turning the piece as you go. Smooth any bumps on the faces the same way, avoiding the textured area. Wipe every piece with a dry cloth afterward, because dust left on the surface stops paint from gripping.
Paint and seal
You can leave the clay white, paint it all over or color only the texture. For a soft tinted print, brush thinned acrylic craft paint over the textured area and wipe the surface right away with a barely damp cloth, so color stays only in the hollows. On plain pieces, the dots, stripes and sprigs in this library of painted ornament patterns all work well.
Air-dry clay is not waterproof, even when fully dry, so sealing is worth the extra step. Brush a thin coat of water-based sealer over the front and edges, let it dry, then seal the back. See how to finish handmade ornaments for more on choosing a finish.
Thread 8 in (20 cm) of ribbon through the hole and knot the ends to make a loop.
Care: decorative and fragile
These ornaments are decorative only. They are harder than they look but will chip or break if dropped on a hard floor, so hang them on sturdy inner branches, out of reach of young children and pets. Keep them away from moisture, and wrap each one separately in tissue for storage.
Clay also takes an impression beautifully, which makes it a good material for a dated ornament. The collection of keepsake ornament ideas has several ways to use it.
Frequently asked questions
How long do air-dry clay ornaments take to dry?
Pieces about 1/4 in (6 mm) thick usually need a day or two at room temperature, turned over once partway through. Humid rooms and thicker clay take longer. They are ready when the color is an even chalky white and the clay no longer feels cool. Check the product label for its guidance.
Why did my air-dry clay ornaments curl or crack?
Curling happens when one face dries faster than the other, so turn the pieces once and keep them out of sun and drafts. Cracks usually come from clay that was rolled too thin, dried too quickly or was not kneaded smooth first. Rolling between guides to an even thickness prevents most problems.
Do you have to seal air-dry clay ornaments?
Sealing is strongly recommended. Dry clay stays porous and can soften or mark if it gets damp. A thin coat of water-based brush-on sealer on the front, edges and back helps protect the surface and the paint. The ornaments are still decorative and fragile, so store them wrapped and dry.