Yarn-Wrapped Ornaments: Stars, Trees and Rings
Cut a ring, tree or star from stiff cardboard and wrap it in yarn. Step-by-step wrapping for each shape, how to cover star points, and simple two-color ideas.
Tutorial at a glance
Materials
- Stiff cardboard
- Medium-weight yarn, 5 to 8 yards (4.5 to 7.5 m) per shape
- White craft glue or tacky glue
- Scissors, pencil and ruler
- 8 in (20 cm) of twine per ornament
- Blunt yarn needle (optional)
A piece of cardboard, a few yards of yarn and a dab of glue are all it takes to make yarn-wrapped ornaments. You cut a simple shape, wind yarn around it until the cardboard disappears, and tie on a loop. The yarn hides rough cutting, so this is one of the most forgiving projects you can choose.
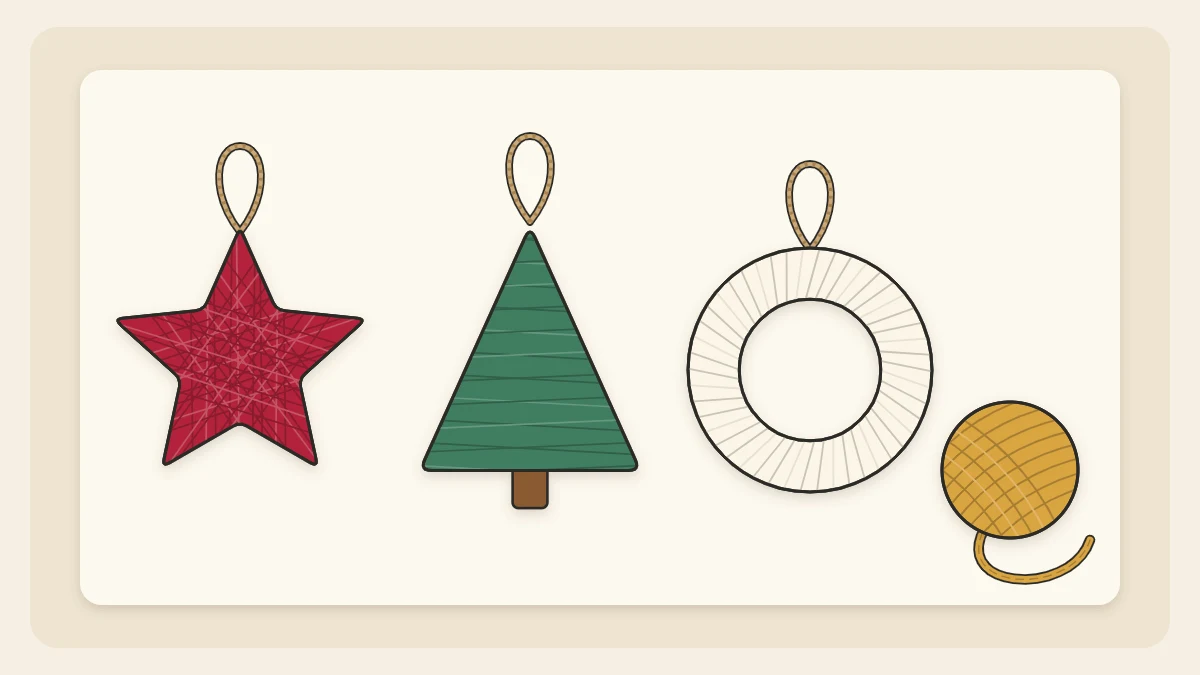
The three shapes below, a ring, a tree and a star, are listed from easiest to trickiest. Each one teaches a slightly different way of wrapping, and together they make a neat matching set.
What you need
- Stiff cardboard, such as a shipping box or two layers of cereal-box card glued together
- Medium-weight yarn: about 5 yards (4.5 m) for a ring, 6 yards (5.5 m) for a tree and 8 yards (7.5 m) for a star
- White craft glue or thick tacky glue
- Scissors, a pencil and a ruler
- About 8 in (20 cm) of twine or yarn per ornament for the loop
- A blunt yarn needle (helpful for tucking ends, not essential)
Yarn amounts are approximate; thicker yarn covers faster and uses less. Cutting thick cardboard takes firm pressure, so an adult should handle that step.
Choosing the yarn
Smooth, medium-weight yarn is the easiest to work with. It covers quickly, lies flat and shows the wrapped texture clearly. Chunky yarn is faster but looks bulky on shapes smaller than about 4 in (10 cm). Very fuzzy or slippery yarns slide off points, so save them for later.
Cut the cardboard shapes
- Ring: draw a circle 3 in (7.5 cm) across by tracing a glass, then a 1 1/2 in (4 cm) circle in its center. Cut out the outer circle, then pierce the middle and cut out the inner one.
- Tree: draw a triangle 3 in (7.5 cm) wide at the base and 4 in (10 cm) tall. Cut it out, then snip tiny notches, about 1/8 in (3 mm) deep, every 1/2 in (12 mm) along both sloping sides. The notches stop the yarn from sliding upward.
- Star: draw a five-point star about 4 in (10 cm) across with fairly wide points and cut it out. Narrow, spiky points are hard to cover, so keep them plump.
How to wrap a ring
The ring is the place to learn the basic method, because the yarn cannot slip off.
- Cut about 5 yards (4.5 m) of yarn and wind it into a small bundle that fits through the center hole.
- Put a dab of glue on the back of the ring. Press the yarn tail into it, pointing along the ring, and hold for about 30 seconds.
- Pass the bundle through the hole and around the outside, pulling each wrap snug but not tight enough to bend the card.
- Lay each new wrap beside the last one, overlapping slightly. Yarn fans out on the outer edge and bunches on the inner edge; that is normal.
- Wrap over the glued tail to hide it and continue until you are back at the start.
- Cut the yarn, leaving a 3 in (7.5 cm) tail. Tuck the tail under the last few wraps on the back with the yarn needle, or fix it with a small dab of glue, and trim.
If you enjoy the ring, the same base becomes a tiny wreath with a bow and felt leaves; see mini wreath ornaments for three versions.
How to wrap a tree
- Glue the yarn tail to the back, near one bottom corner.
- Wrap straight across the base three or four times, then move up, seating the yarn in each pair of notches. Make two or three wraps at each level so no cardboard shows.
- Near the tip, where the shape gets too narrow to hold a wrap, stop and add a small dab of glue to the front and back of the tip. Wind the last few turns over the glue and hold them until they grip.
- For fuller coverage, wrap back down in long diagonal passes, crossing the first layer. The diagonal lines look like garlands.
- Secure the end on the back as you did for the ring.

How to wrap a star
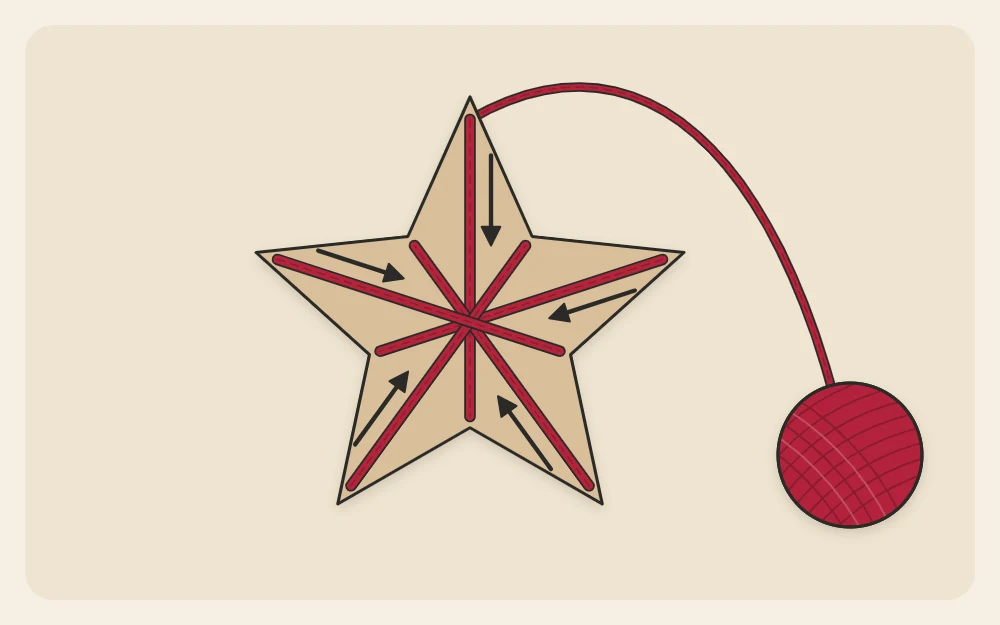
A star cannot be wrapped in one direction; the yarn would fall straight off the points. The answer is crossing wraps that sit in the inner corners, the notches between the points, where they are held in place.
- Glue the tail to the center of the back.
- Bring the yarn to the front through one inner corner, take it past the side of a point and straight across the middle to the inner corner on the opposite side, then around the back to where you started. Repeat four or five times.
- Shift to the next inner corner and wrap across to the one opposite it. Keep moving around the star, a few wraps at each position, until the center and the bases of the points are covered. You will circle the star two or three times.
- Now cover the points. Wrap around one point from its base toward the tip in neat turns. Stop about 1/4 in (6 mm) from the tip, add a dab of glue to the tip, lay the last turns over it and hold briefly.
- Carry the yarn across the back to the next point and repeat for all five.
- Finish with two or three more crossing wraps to hide any gaps, then secure the end on the back.
Tip
If bare cardboard keeps peeking through, color the shape with a marker or paint in a shade close to the yarn before you start wrapping.
Wrapping with two colors
- Bands: wrap part of the shape in one color, glue the end on the back, start the second color beside it and overlap the join by two wraps. This suits rings and trees.
- Held together: hold two strands side by side and wrap them as one. You get a twisted, speckled effect and the work goes twice as fast.
Adding the hanging loop
Fold 8 in (20 cm) of twine in half. On a ring, pass the folded end through the hole, pull the cut ends through the fold and tighten, then knot the ends. On a star or tree, thread the twine under several wraps at the top center of the back with the yarn needle and knot the ends together. Other ways to attach a hanger are covered in the guide to hanging loops.
Let any glue dry before hanging; the time depends on the room and the product, so follow the label. With the leftover yarn, try a batch of yarn pom-pom ornaments to hang alongside.
Frequently asked questions
How much yarn does a yarn-wrapped ornament need?
For shapes about 3 to 4 inches across in medium-weight yarn, plan on roughly 5 yards for a ring, 6 for a tree and 8 for a star. Thicker yarn uses less and fine yarn uses more, so wind off a little extra before you begin.
How do you keep yarn from sliding off the points of a star?
Wrap the center first with crossing passes that sit in the inner corners between the points. Then wrap each point from its base toward the tip and stop just short of the end. A small dab of craft glue on the tip holds the last few turns in place.
What cardboard is best for yarn-wrapped shapes?
Use cardboard stiff enough that it does not bend when the yarn is pulled snug. Corrugated box card works well, as do two layers of cereal-box card glued together and left to dry flat. Thin single-layer card tends to curl as the wraps build up.