Stuffed Fabric Star Ornament: A Simple Hand-Sewn Star
Sew a plump cotton star by hand with backstitch and ladder stitch. Step-by-step help with the tricky parts: clipping inner corners, turning the points and stuffing them evenly.
Tutorial at a glance
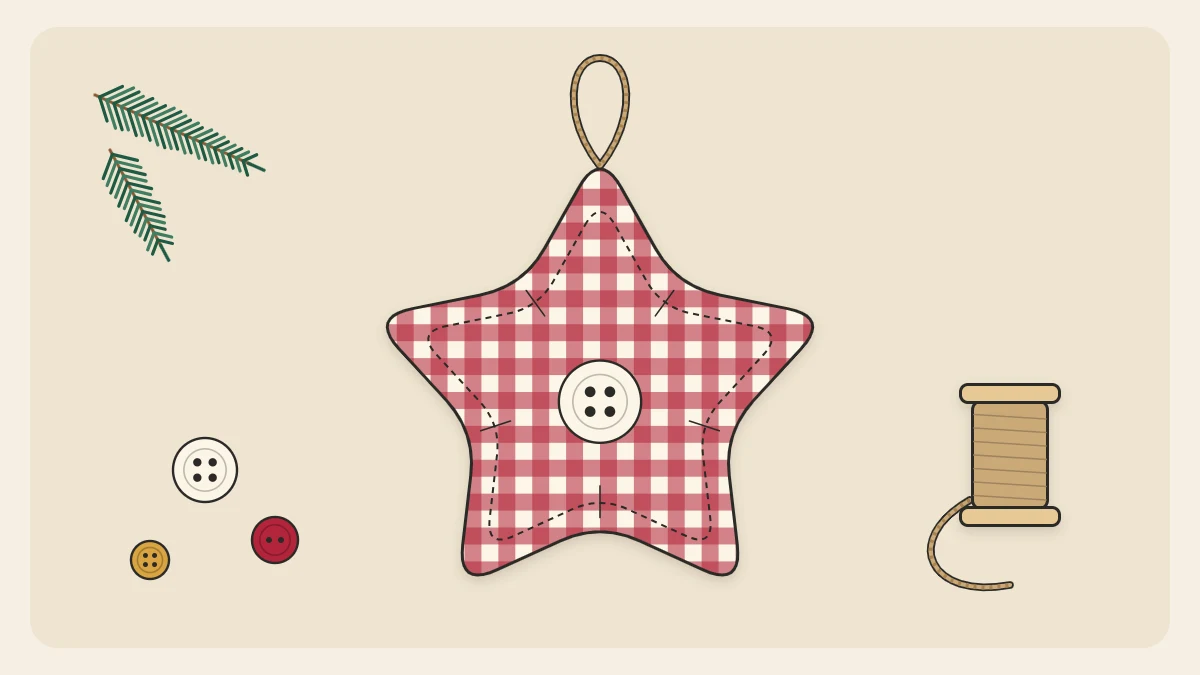
Materials
- Two 7 in (18 cm) squares of cotton fabric
- Matching sewing thread
- Hand-sewing needle and pins
- Polyester toy filling
- One 5/8 in (1.5 cm) button
- 8 in (20 cm) of twine
- Paper for the template
A stuffed fabric star ornament is a small, satisfying first sewing project: two pieces of cotton, one seam around the outside, a handful of filling and a button. It takes an evening and uses only two hand stitches.
The star shape does ask for a little care. Five points and five inner corners all have to turn right side out cleanly, so this tutorial spends extra time on clipping, turning and shaping, which is where most first stars go wrong.
What you need
- Two pieces of woven cotton, each about 7 in (18 cm) square
- Paper and pencil for a star template about 6 in (15 cm) across
- Sewing thread to match, a hand-sewing needle and pins
- Polyester toy filling, a small handful
- A blunt tool: a chopstick or the rounded end of a paintbrush
- One button about 5/8 in (1.5 cm) across
- 8 in (20 cm) of twine or narrow ribbon
- Small sharp scissors
Needles, pins and sharp scissors are adult tools. The button is a small part, so hang the finished star out of reach of young children and pets.
Draw a template with wide points
Draw or print a five-point star about 6 in (15 cm) from tip to tip, with points that are wide rather than needle-thin: aim for each point to be about 1 3/4 in (4.5 cm) wide where it joins the body. Narrow points are almost impossible to turn and stuff.
The star finishes smaller than the template, around 4 1/2 in (11.5 cm) across, because the seam allowance uses up fabric at every tip.
- Cut out the paper star and trace around it on the wrong side of both fabric pieces.
- Cut out both stars on the line.
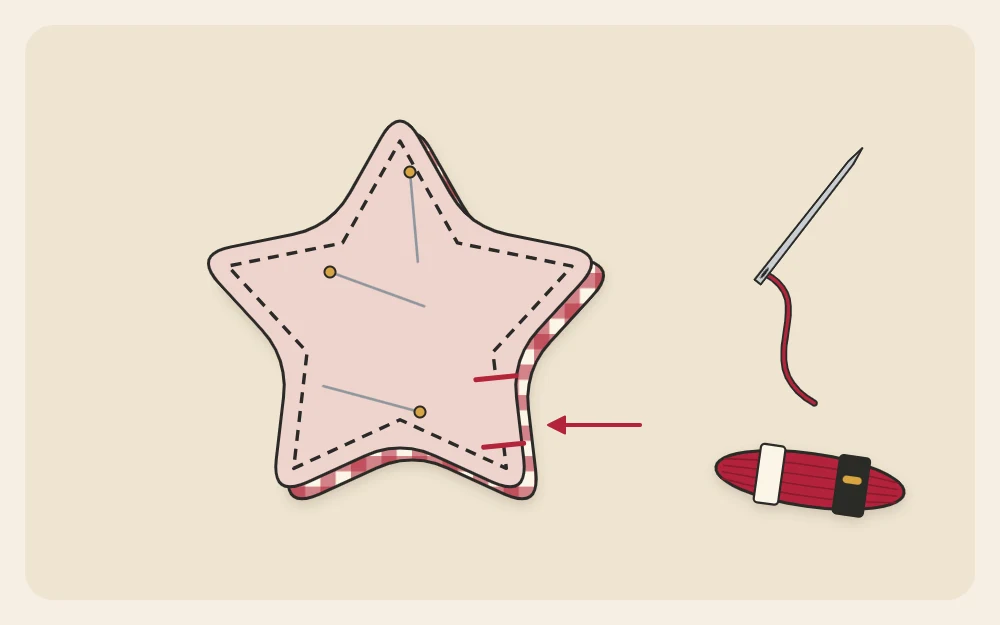
- Place them right sides together, so the printed faces touch, and line up the points. Pin through the middle and through each point.
- With a pencil, draw the stitching line 1/4 in (6 mm) inside the edge all the way around. On one straight edge, mark a gap about 1 1/4 in (3 cm) long that you will leave unsewn.
Sew the seam with backstitch
Backstitch makes a solid line with no spaces between stitches, so filling cannot push through. Thread the needle with about 24 in (60 cm) of thread and knot the end.
- Start at one end of the gap. Bring the needle up through both layers on the line and make one small stitch forward, about 1/8 in (3 mm) long.
- Bring the needle up one stitch length ahead, then take it back down into the end of the previous stitch. Repeat, always stepping back to meet the last stitch.
- At the tip of a point, sew one stitch straight across instead of pivoting on a single thread. This tiny flat tip gives the fabric room to turn.
- At each inner corner, end a stitch exactly in the corner, then change direction.
- Stop at the other end of the gap, make two stitches on the spot and cut the thread.
Clip the corners and turn
- At every inner corner, snip straight toward the stitching and stop a thread or two short of it. Without this cut the fabric cannot spread, and the corner puckers.
- Trim the tip of every point straight across, about 1/8 in (3 mm) beyond the stitches, to remove bulk.
- Reach through the gap, pinch the far point and pull it through. Work each point out in turn.
- Slide the blunt tool inside and push each point out gently, rolling the seam between your fingers to bring it to the edge. A sharp tool will poke through the tip, so use something rounded.
- Flatten the star with your hands and finger-press the seams.
Watch out
If you snip through a stitch, turn the star back and sew a few backstitches just inside the cut before you stuff it.
Stuff the points first
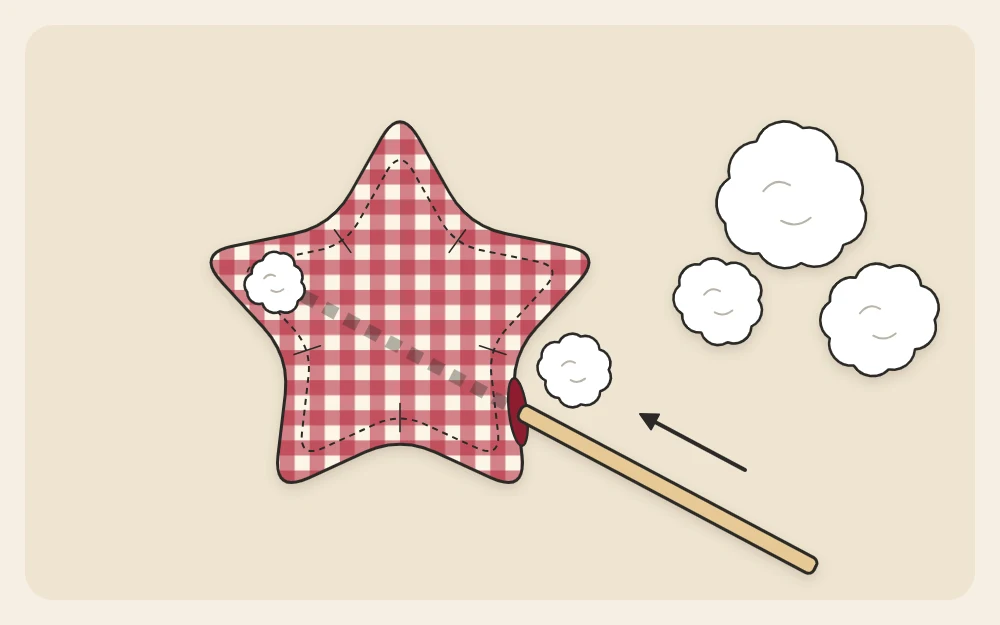
Points are tricky because filling pushed in as one large lump stops at the body and never reaches the tips. Pull the filling into tufts about the size of a grape instead.
- Push one small tuft right into the tip of the point farthest from the gap, using the blunt tool.
- Add a second tuft behind it, then fill the other four points in the same way.
- Fill the center last. Stop when the star is plump but still gives when squeezed; an overfilled star strains the seam and wrinkles at the inner corners.
Close the gap with ladder stitch
Ladder stitch pulls the two folded edges together so the join disappears.
- Fold the raw edges of the gap to the inside, in line with the seam, and pinch them flat.
- Knot a new thread and bring the needle out through one fold from the inside, hiding the knot.
- Go straight across to the other fold, slide the needle along inside it for about 1/8 in (3 mm) and come out.
- Cross back and do the same on the first fold. The threads between the folds look like the rungs of a ladder.
- Every three or four stitches, pull the thread snug so the rungs vanish. Finish with two tiny stitches in the seam, pass the needle through the body and trim the thread where it comes out.
Add the button and hanging loop
- Thread the needle with a doubled thread and knot it. Push it through the center of the star from back to front.
- Sew on the button, taking the needle through the whole star three or four times and pulling gently so the center dimples.
- Knot off at the back under the last stitch.
- Fold the twine in half and knot the ends together. Stitch the knot firmly to the back of the top point, just below the tip.
Tip
Gingham and other woven checks are forgiving for a first star: the lines help you keep stitches straight and hide small wobbles.
Variations to try next
Cut the front and back from different prints, or stitch an initial or a year on the front piece before you sew the seam; there are more suggestions in these personalized ornament ideas.
If turning points feels fiddly, felt is an easier material because its edges do not fray and nothing has to be turned; the felt ornament basics guide covers that method. And for leftover pieces too small for a star, these no-sew fabric scrap ornaments need only glue.
Frequently asked questions
Why do the points of my fabric star look rounded or lumpy?
Usually the seam allowance at the tip was not trimmed, or the filling went in as one big piece. Trim each tip straight across close to the stitching before turning, ease the point out with a rounded tool, and stuff with very small tufts pushed right to the end of every point.
Can I sew this star on a sewing machine instead?
Yes. Use a short straight stitch, sew slowly on the drawn line and stop with the needle down to turn at each tip and inner corner. Leave the same gap on one straight edge. Clipping, turning, stuffing and the ladder stitch closing are all done by hand exactly as described.
What can I use for stuffing if I have no toy filling?
Clean filling from an old cushion works well, and so do tiny snippets of leftover yarn or fabric, although snippets give a firmer, heavier star. Pull whatever you use into small loose tufts first so it packs evenly, and avoid anything that would show through pale cotton.