Personalized Ornament Ideas: Names, Dates and Initials
Five ways to add a name, initial or year to a handmade ornament without special equipment: paint pen lettering, stitched initials, stamped clay, paper tags and letter beads, with spacing tips.
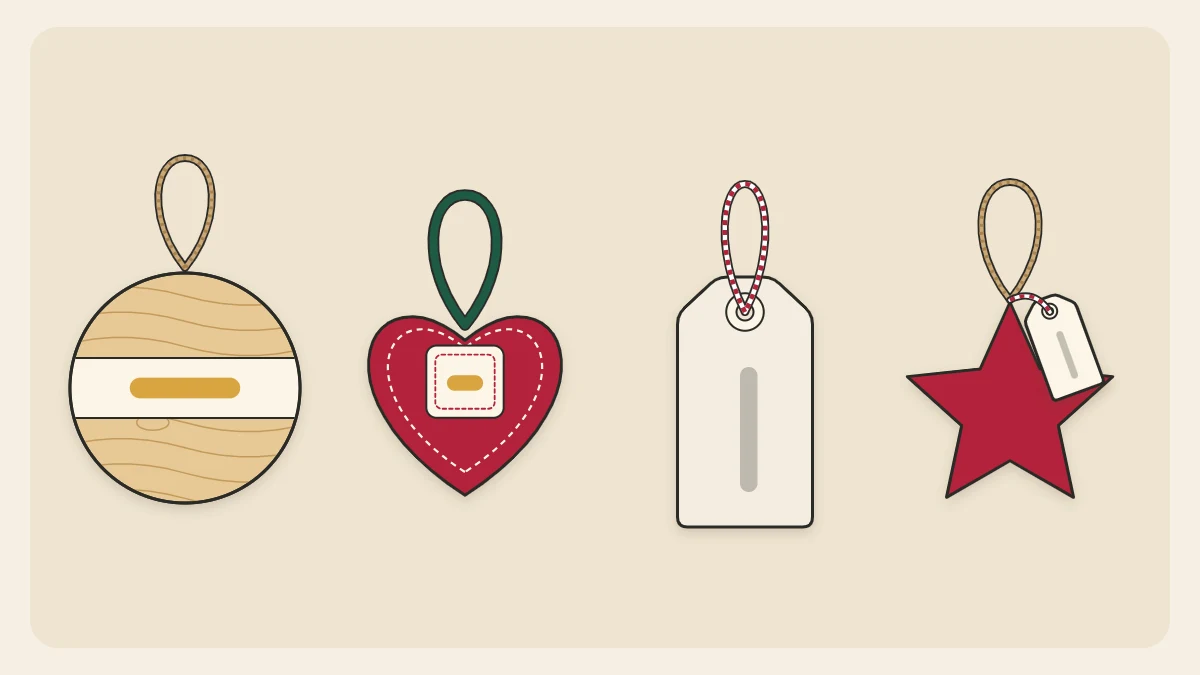
A name, an initial or a year is often what turns a nice handmade ornament into the one someone looks for on the tree every December. The personalized ornament ideas below need no cutting machines or special equipment, only a pencil, a steady pace and a few minutes of planning before you commit.
There are five methods here, suited to different materials. Choose the one that matches the ornament you already have, or pick the method first and make an ornament to suit it.
Decide what to write
Small ornaments have very little room, so short wording almost always looks best. Before you start, count the characters, including spaces.
- A single initial: the easiest option and the boldest, since one letter can fill the whole shape.
- A first name: up to about seven letters fits comfortably across a 3 in (7.5 cm) ornament.
- A year: four digits, compact and easy to space.
- Two initials and a year: a good choice for a wedding or a first home.
- A short word: joy, home, noel, peace.
Longer names can be split over two lines, shortened to a nickname or moved to a tag. If you are making ornaments as gifts, check the spelling of every name with someone who knows before you begin.
Plan the spacing first
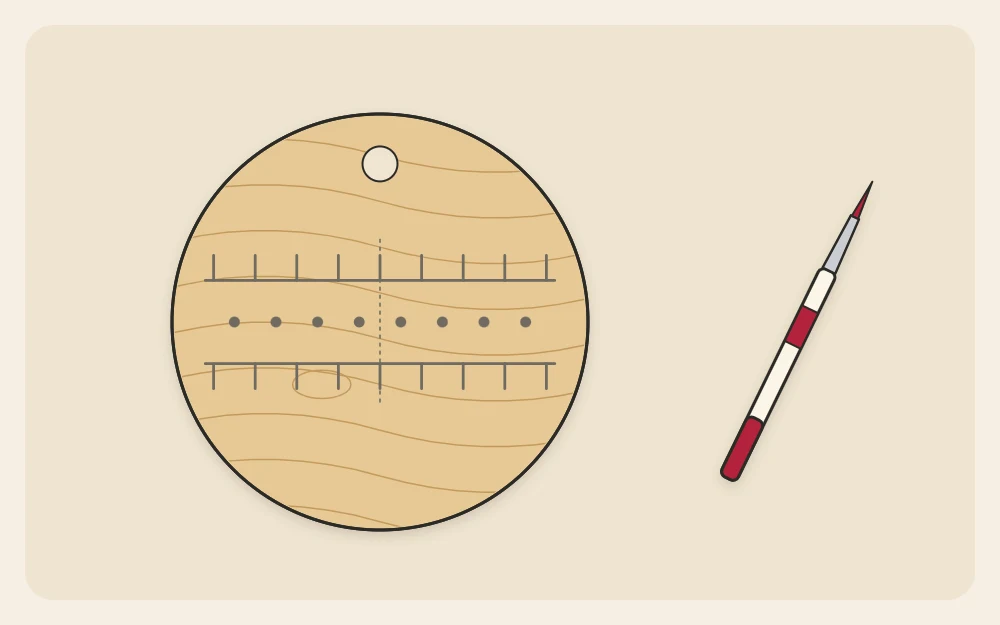
Most lettering that goes wrong runs out of room at the right-hand side. A light pencil guide prevents that.
- Draw two faint parallel lines with a soft pencil and a ruler to mark the top and bottom of the letters. On a round shape, place them across the widest part.
- Mark the center point between the two ends of the line.
- Find the middle character of your word. In a five-letter name it is the third letter; in a four-digit year, the center falls in the gap between the second and third digits.
- Make a small tick for each letter, working outward from the center to the left and right in equal steps. Give wide letters such as M and W a little more room and narrow ones such as I a little less.
- Sketch the letters lightly in pencil on the ticks, starting from the middle and working out.
Tip
Write the name on scrap paper at full size first. Cut it out and hold it against the ornament to see whether it fits before marking anything.
Five ways to add a name or year
1. Paint pen over a pencil guide
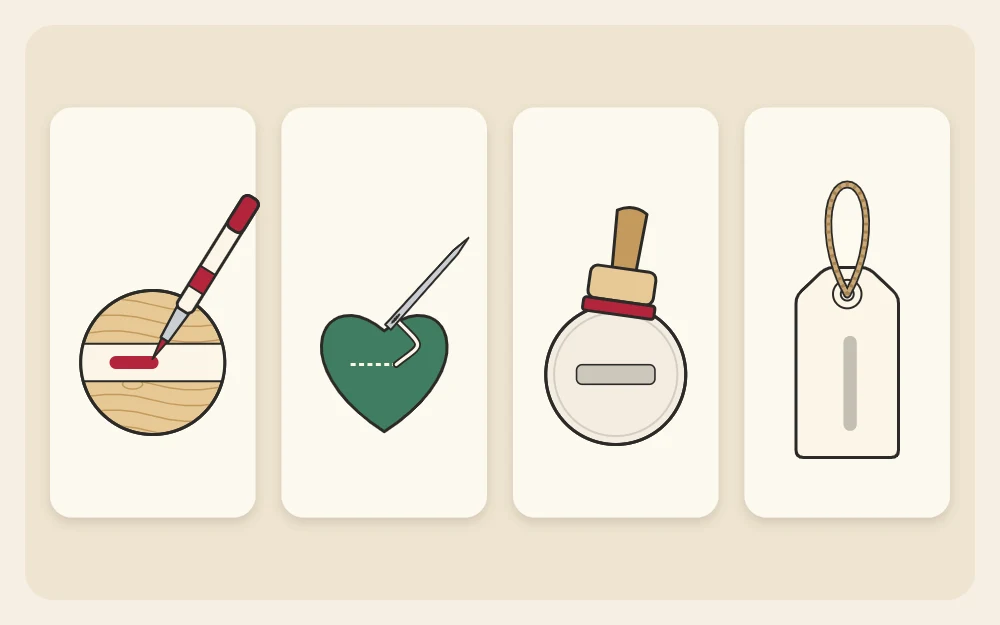
This is the best method for wood, sealed clay and other smooth, hard surfaces. Shake the pen, start it on scrap paper and trace over your pencil letters with slow, light strokes, pulling the pen toward you rather than pushing it. Let the paint dry completely before erasing any visible pencil. On bare wood, test the pen on the back first, since ink can spread along the grain; wood slice ornaments in particular benefit from a thin coat of sealer before lettering.
2. Stitched initials in backstitch
For felt and fabric, draw a single initial about 3/4 to 1 in (2 to 2.5 cm) tall with a chalk pencil. Thread a needle with two strands of embroidery floss and work backstitch along the line, keeping each stitch about 1/8 in (3 mm) long and shortening them on curves. Stitch the initial onto a small felt patch and glue or sew the patch in place, or stitch directly onto the front piece before the ornament is assembled.
3. Stamped air-dry clay
Small letter stamps pressed into soft clay leave a clean, permanent impression. Line the stamps up on the table in order first, then press each one straight down about 1/16 in (2 mm) and lift straight up, again working outward from the middle letter. Practice on a spare scrap of clay to judge the pressure. Once the piece is dry, you can leave the letters plain or tint them. The full method for rolling, cutting and drying is in the guide to air-dry clay ornaments.
4. A paper tag tied to the loop
When an ornament has no flat space, or you do not want to risk writing on it, put the name on a tag instead. Cut a rectangle of cardstock about 1 by 2 in (2.5 by 5 cm), trim two corners at an angle, punch a hole and write with a fine pen. Tie it to the hanging loop with thin twine. A tag can be replaced later, which makes this the most forgiving method.
5. Letter beads
Thread letter beads onto the hanging cord before you knot it, with a plain bead at each end to frame the word. Check that the cord fits through the bead holes before you start, and lay the beads out in order so the word reads correctly from the front. Beads are small parts, so keep them away from young children and pets.
Which method suits which ornament
| Method | Best on | Difficulty | Can it be redone? |
|---|---|---|---|
| Paint pen | Wood, sealed clay | Easy with a guide | Only by repainting |
| Backstitch | Felt, fabric | Easy, slower | Yes, unpick the stitches |
| Stamped clay | Soft air-dry clay | Easy | Yes, while the clay is soft |
| Paper tag | Any ornament | Easiest | Yes, swap the tag |
| Letter beads | Any ornament with a cord | Easiest | Yes, rethread |
Keeping small lettering readable
- Use capitals. Simple block capitals stay clear at small sizes, where joined-up script tends to close into blobs.
- Keep letters at least 1/4 in (6 mm) tall for a paint pen, and taller for stitching.
- Choose strong contrast: white on dark green or red, black or dark brown on bare wood and white clay.
- Leave a margin. Lettering that stops at least 1/4 in (6 mm) short of the edges looks deliberate.
- Use the finest tip you have. Thick lines fill in the gaps inside letters such as A, E and R.
Practice before the real thing
Lettering improves quickly with repetition. Write the name five times on paper at the actual size, then once more on a spare piece of the same material, whether that is a wood offcut, a felt scrap or a ball of clay. The spare shows you how the pen, thread or stamp behaves on that surface before it matters.
If the ornament marks a particular year or occasion, add the date small on the back as well. The collection of keepsake ornament ideas shows how a dated ornament can become a yearly tradition.
Frequently asked questions
What is the best pen for writing names on ornaments?
A fine-tip paint pen works on most hard surfaces, including painted wood and sealed clay, and gives opaque lines in white, black or metallic colors. Test it on the back or on a spare piece first, because ink can spread on bare, unsealed wood. Let the lettering dry fully before sealing over it.
How do you center a name on a round ornament?
Draw faint pencil guide lines across the widest part and mark the middle. Find the middle character of the name, sketch it on the center mark and work outward to both sides in equal steps. Writing the name on paper first and holding it against the ornament confirms that it fits.
How can you personalize an ornament if your handwriting is messy?
Choose a method that does not rely on handwriting. Letter stamps pressed into soft clay and letter beads threaded onto the hanging cord both give neat, regular letters. A single large initial is also far easier to draw well than a full name, and a paper tag can simply be rewritten until you are happy.